Adding Announcements to Your Website
Objective
Learn how to create and customize announcement banners in NextPaw to share important updates and promotions on your website.
Why Use Announcement Banners?
Announcement banners are a powerful way to capture attention and share time-sensitive or high-priority updates directly on your homepage. These banners appear at the very top of your website, making them one of the first elements a visitor sees, whether they're on a desktop or mobile device.
From an SEO (Search Engine Optimization) perspective, announcement banners offer several indirect benefits:
- Improved User Engagement: By drawing attention to current promotions, events, or updates, banners can increase user interaction and time spent on your website, both of which are positive signals to search engines.
- Reduced Bounce Rates: A clear, relevant message in a banner can help users quickly find what they're looking for, decreasing the likelihood that they'll leave your site immediately after landing.
- Better Internal Linking: Banners often include buttons or links to deeper pages on your site (e.g., a blog post, event page, or product category), which helps search engines crawl and index more of your content while also guiding users toward conversion.
- Fresh Content Signals: Regularly updating your banners shows that your site is active and being maintained, which search engines favor over static, outdated content.
When used effectively, announcement banners enhance the user experience and support your site's overall SEO health by encouraging traffic flow, reducing exit rates, and promoting timely and relevant content across your website.
These banners appear at the top of your website and can include styling, links, and targeted messaging.
How to Add an Announcement Banner
- Access the Announcements Section
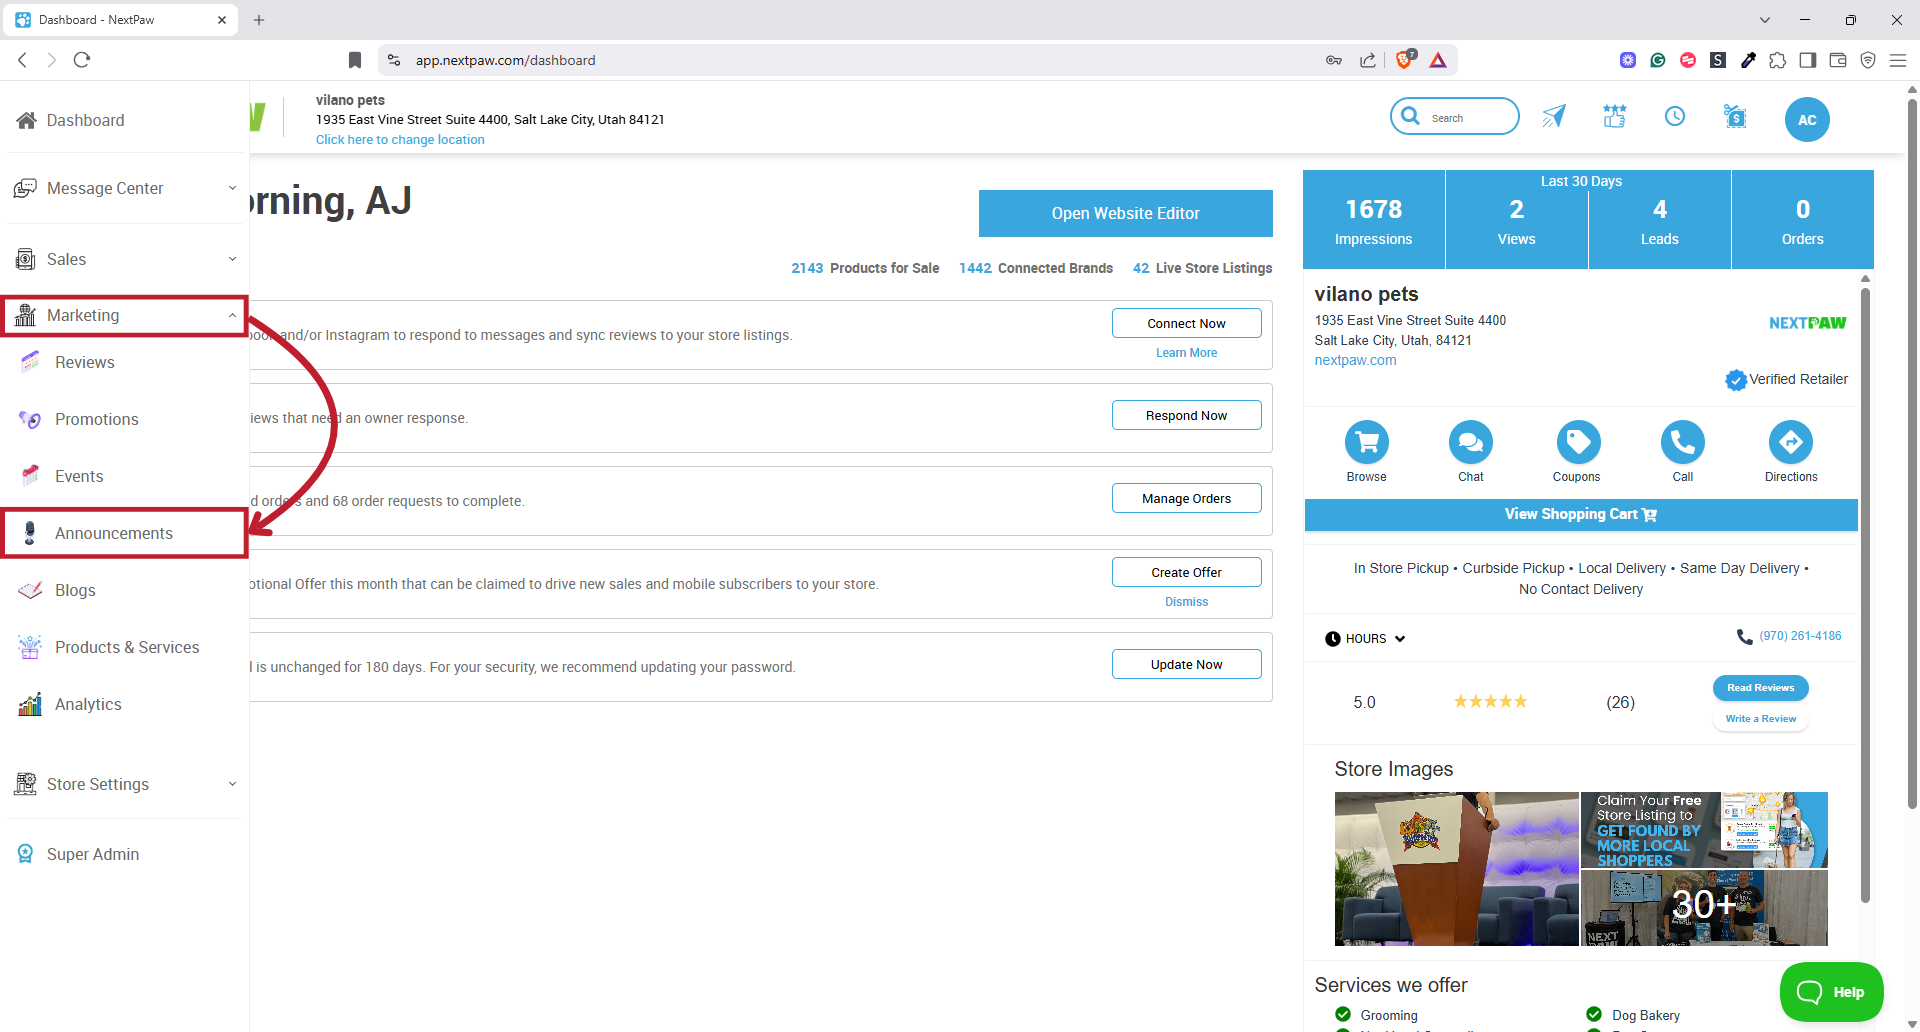
- From the NextPaw Dashboard, select Marketing from the left-hand menu.
- Select Announcements.
- Click Add Announcement in the top right corner.

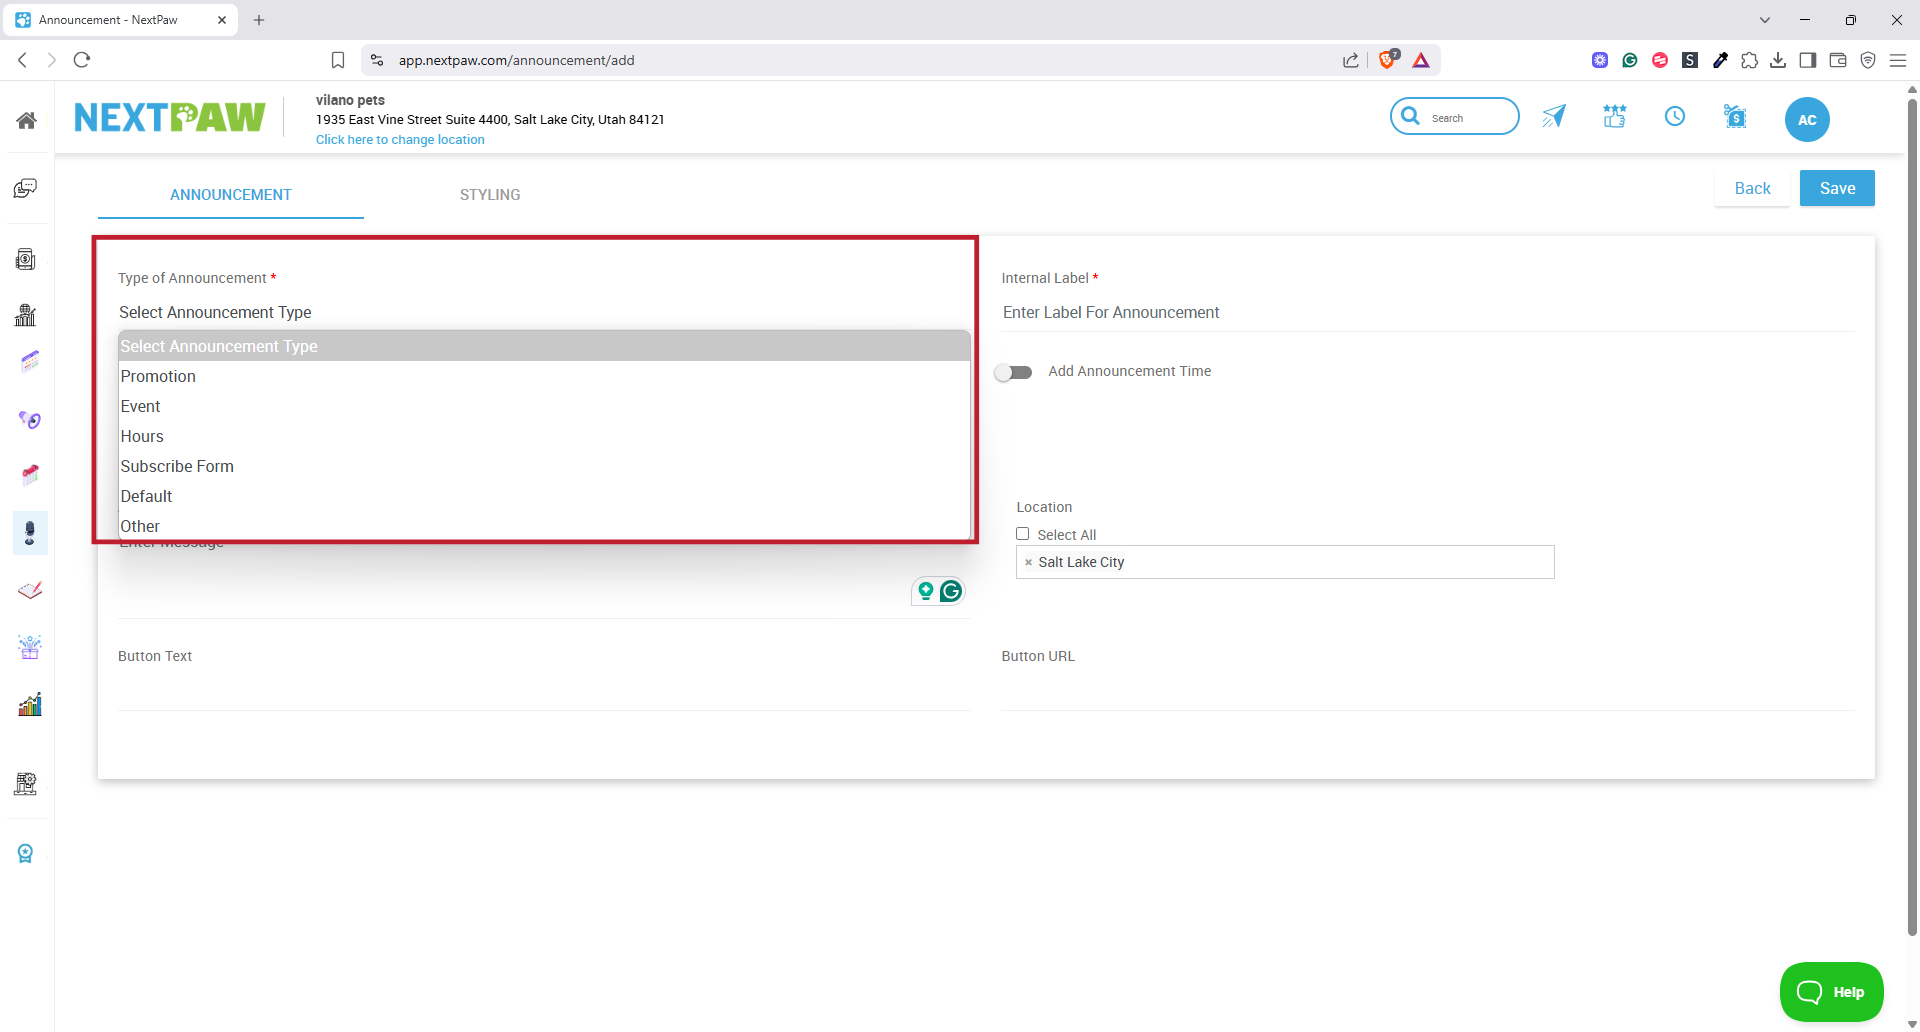
- Choose an Announcement Type
- Choose an Announcement Type from the dropdown to help organize your announcements for reuse.
- Available types include:
- Promotion
- Event
- Hours
- Subscribe Form
- Default
- Other
- Note: All announcement types require a start date, except for the Subscribe Form. That type is always active by default, but will be temporarily replaced if another active banner is running. Once other banners expire, the Subscribe Form will reappear.

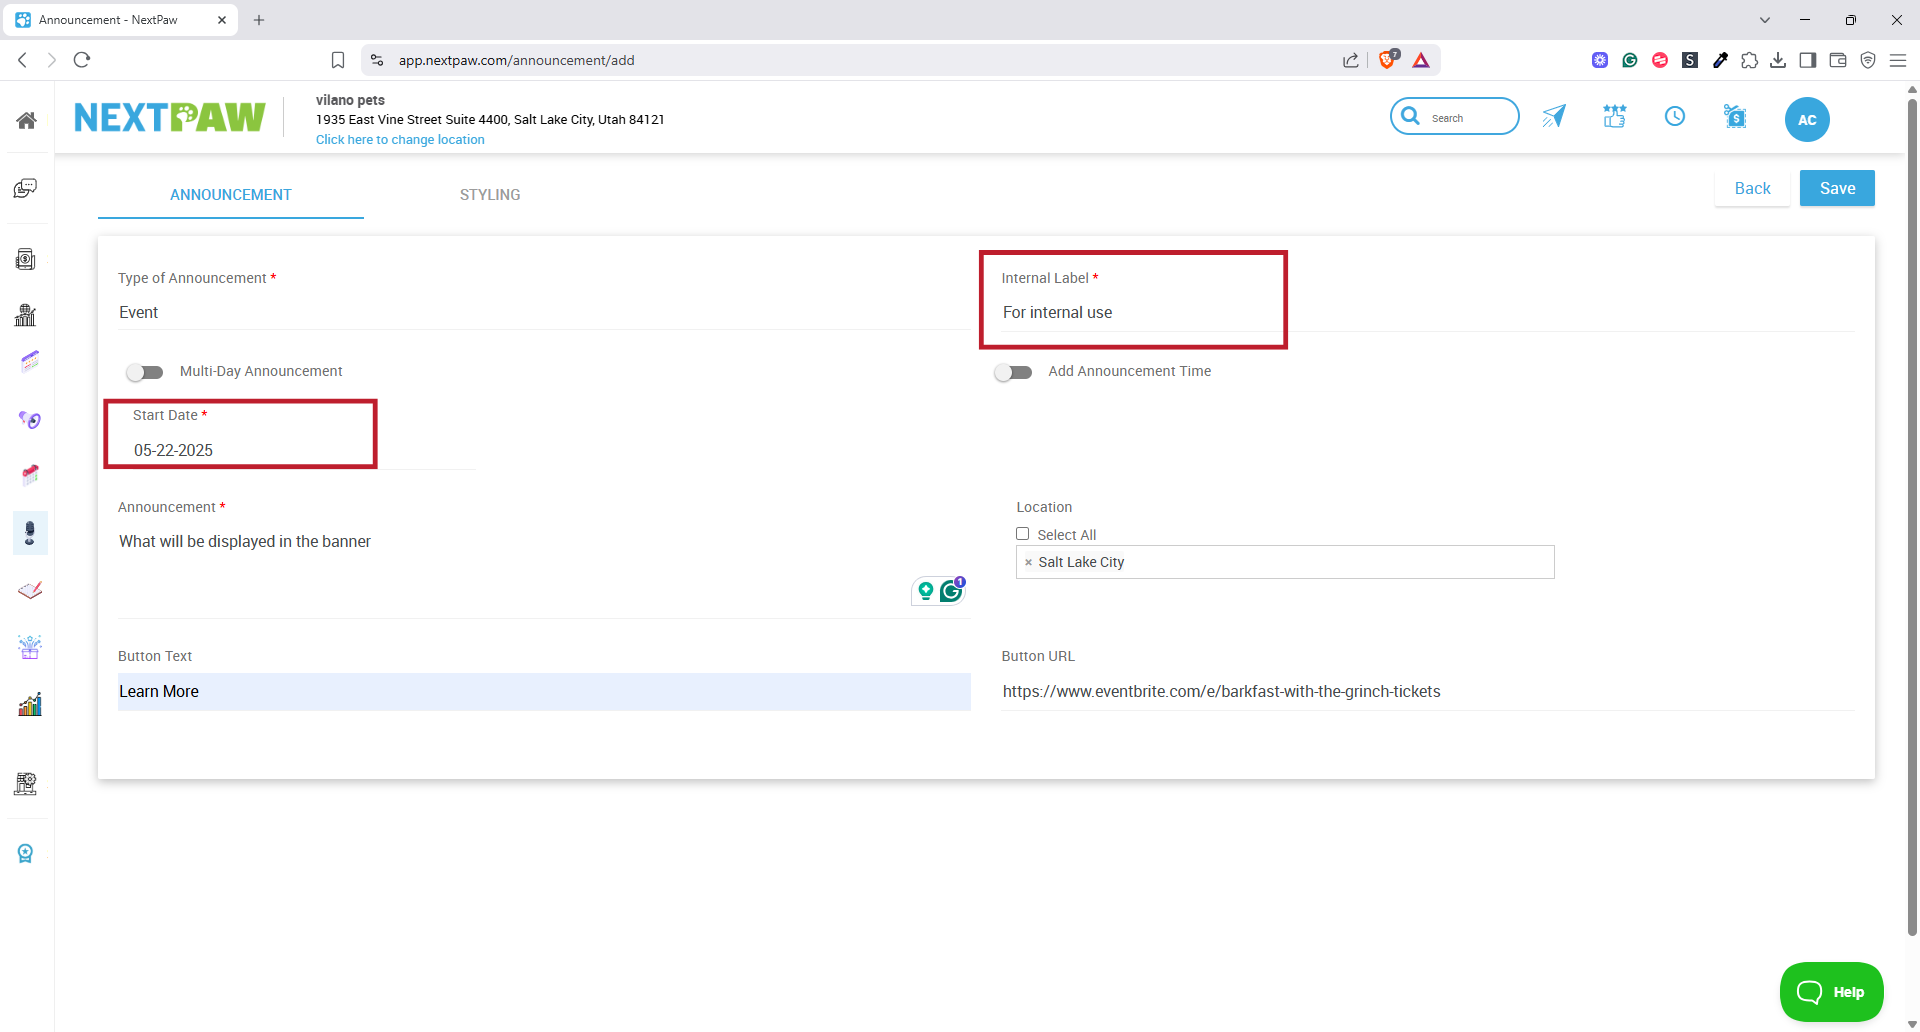
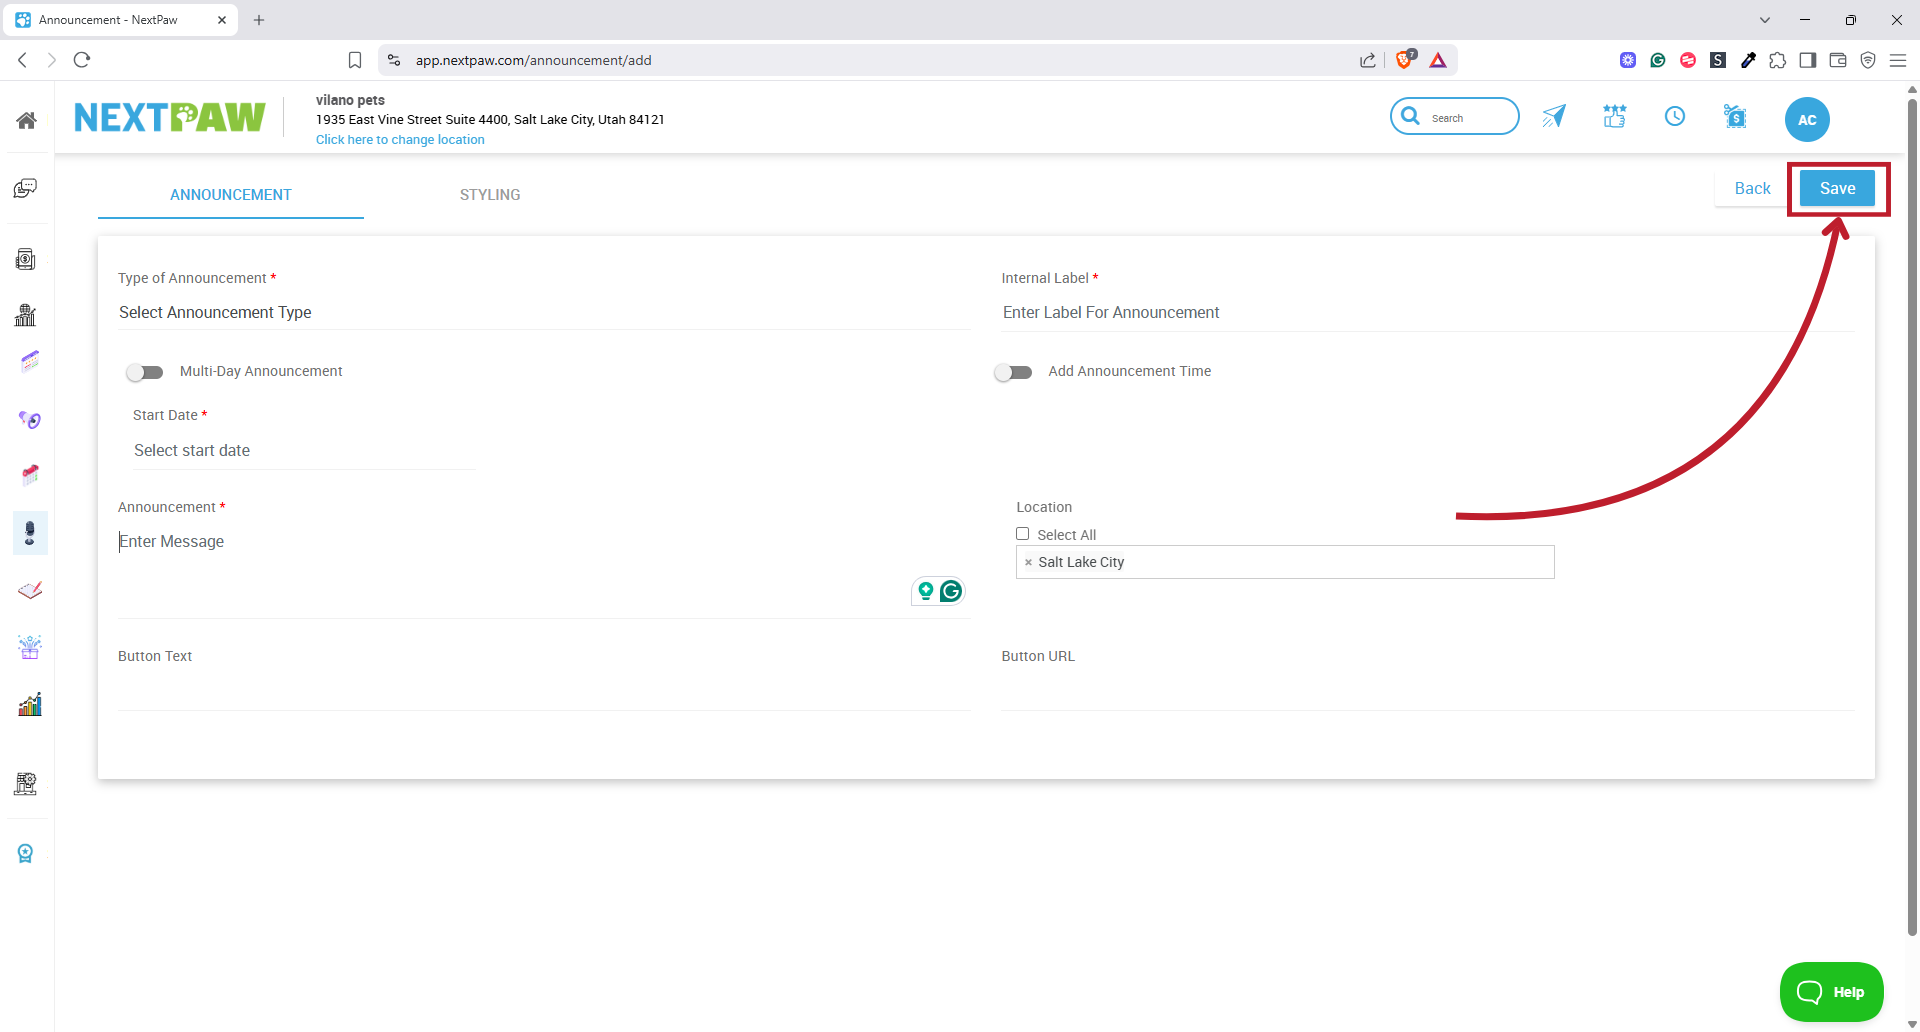
- Enter Basic Information
- Provide an Internal Label to identify this banner in your dashboard (not visible on the site).
- Select a Start Date to control when the banner appears on your website.

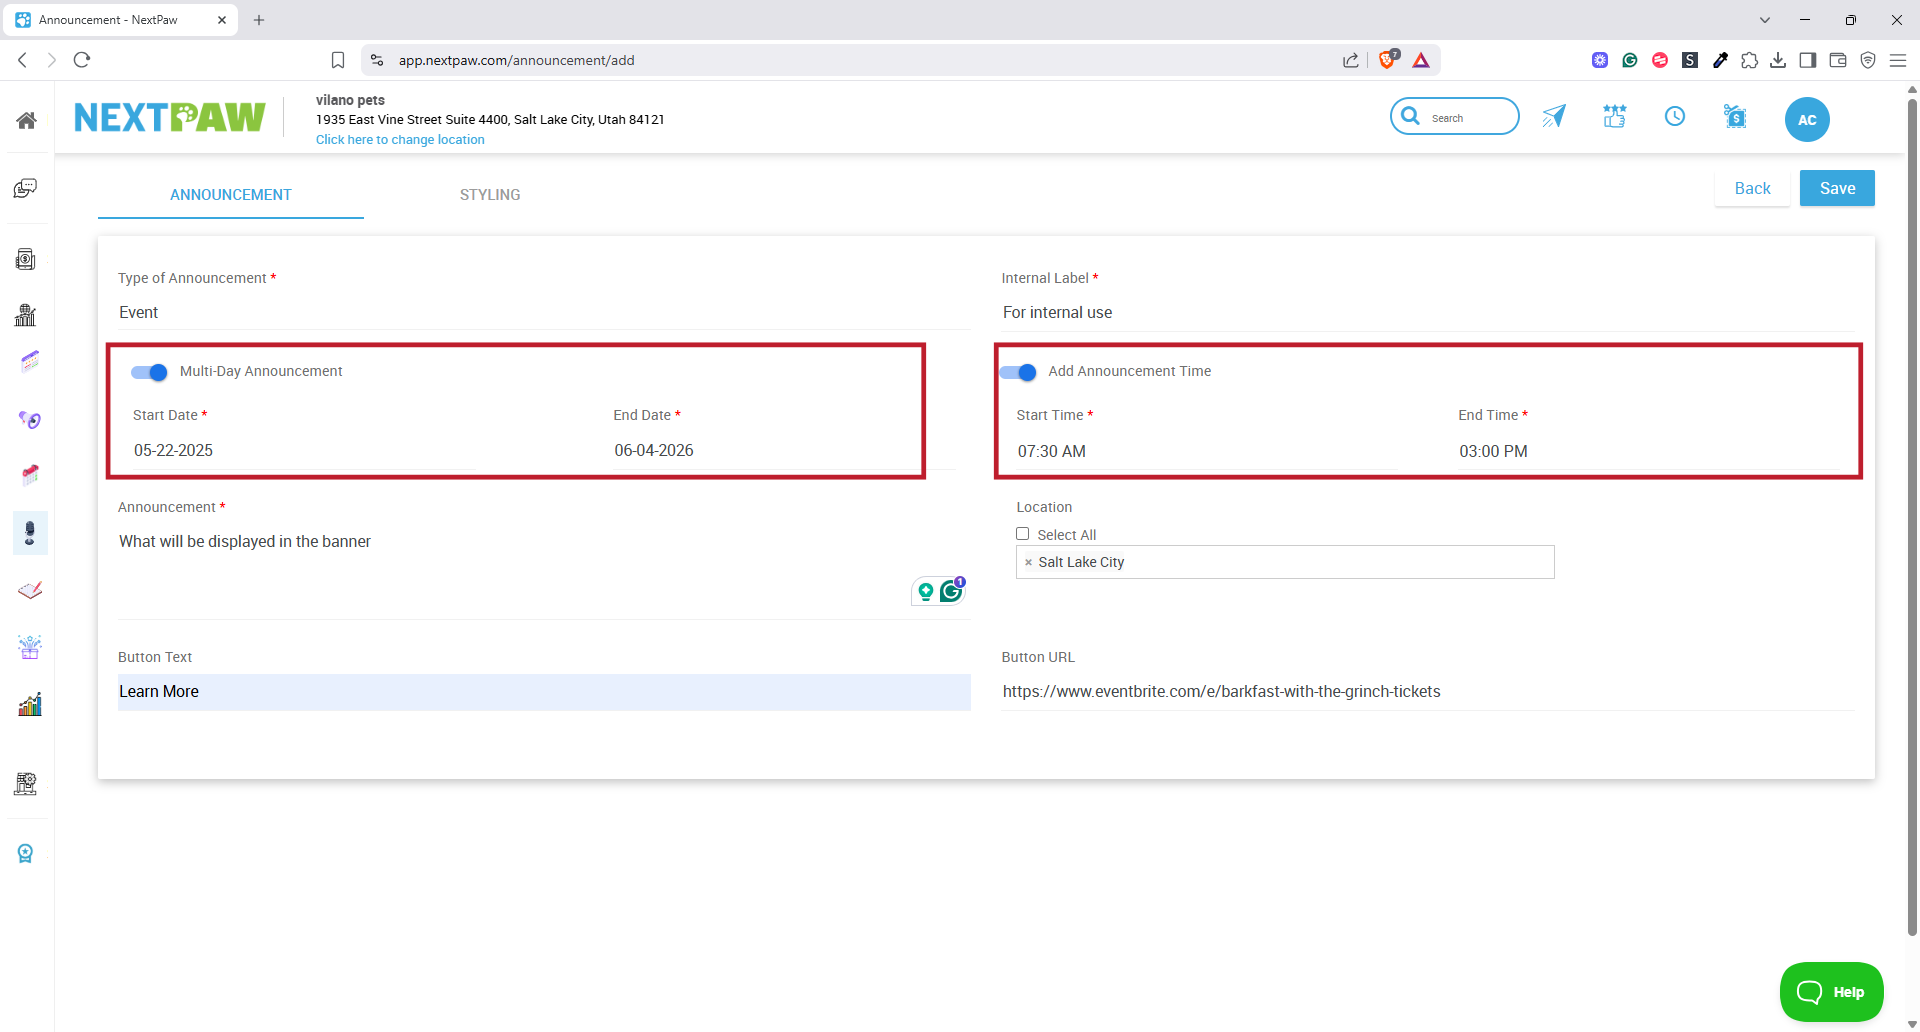
- If the banner runs for multiple days, enable Multi-Day Announcement and set the end date.
- If the banner only runs during certain hours, Add Announcement Time. The banner will only show during the selected hours.

- Add the message you want displayed in the Announcement Text field.

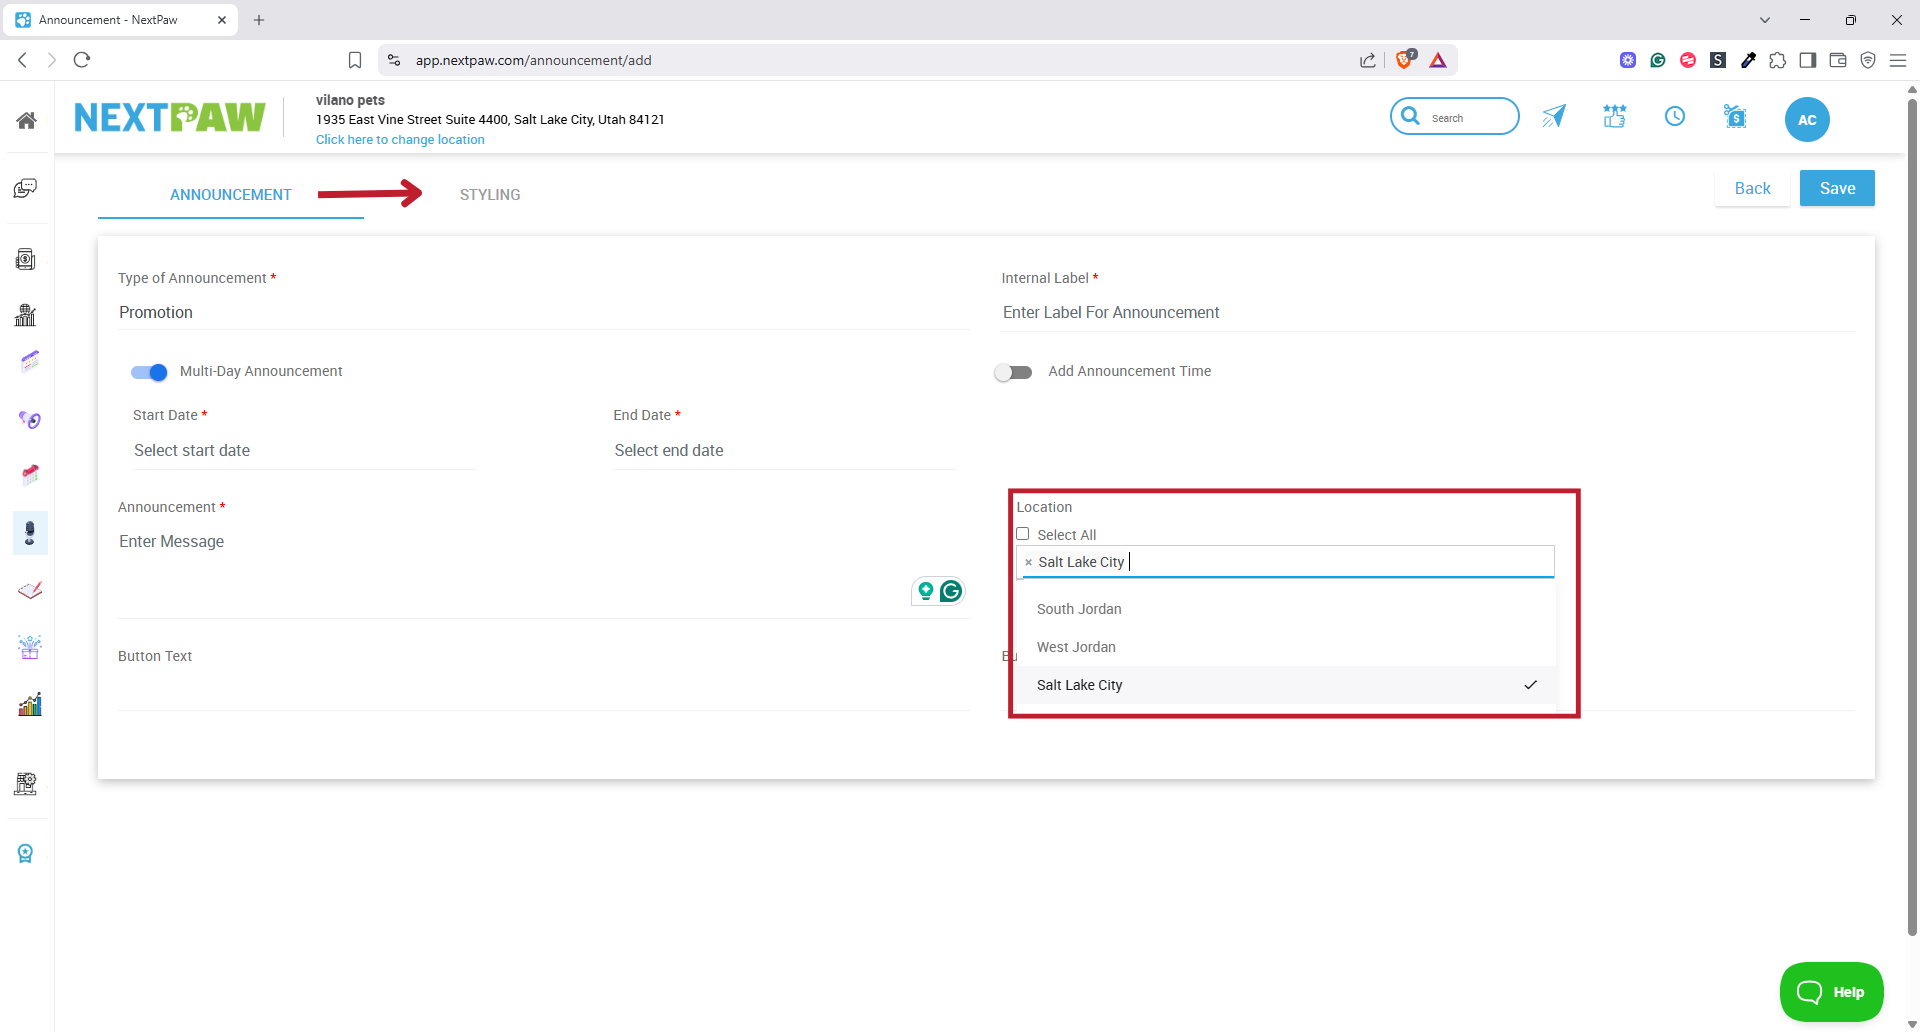
- If you manage multiple locations, choose which location(s) should show the banner.

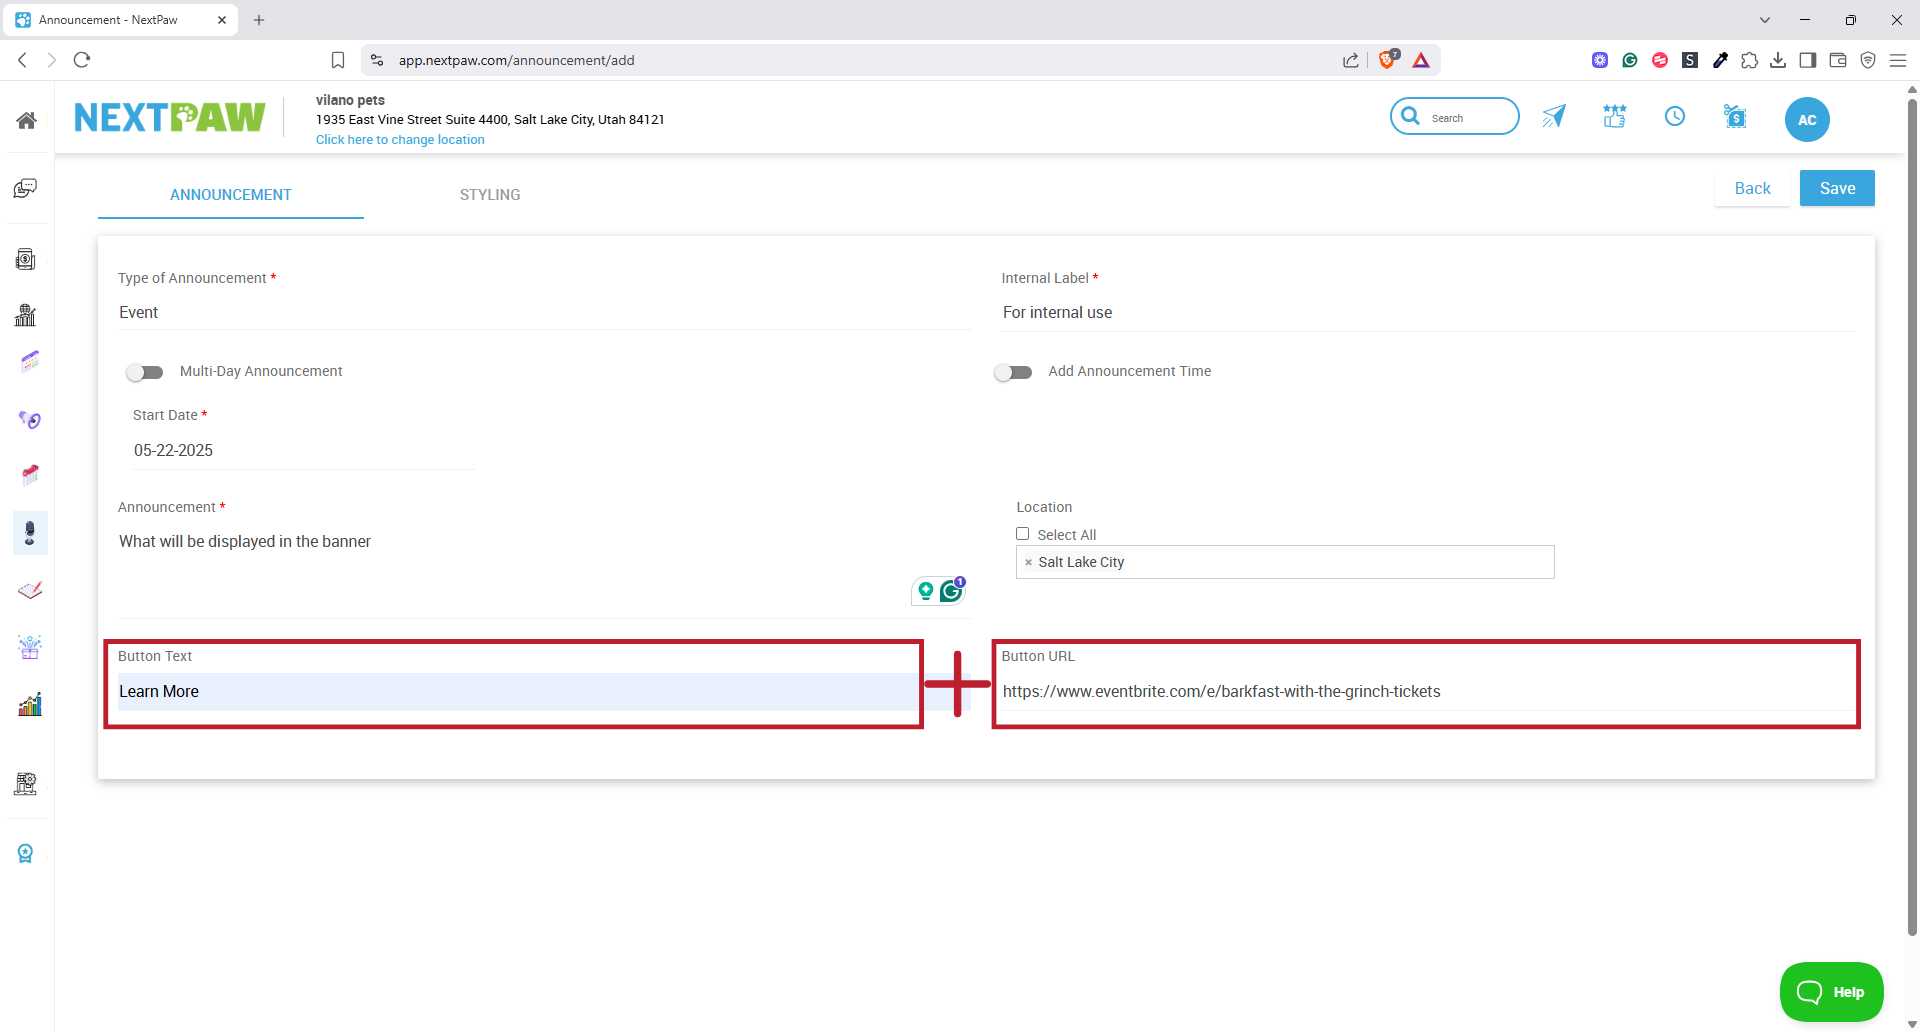
- If you'd like to add a button:
- Enter a label in the Button Text field.
- Enter a destination URL in the Button URL field.
Note: If you add Button Text and no Button URL, your button will not work.

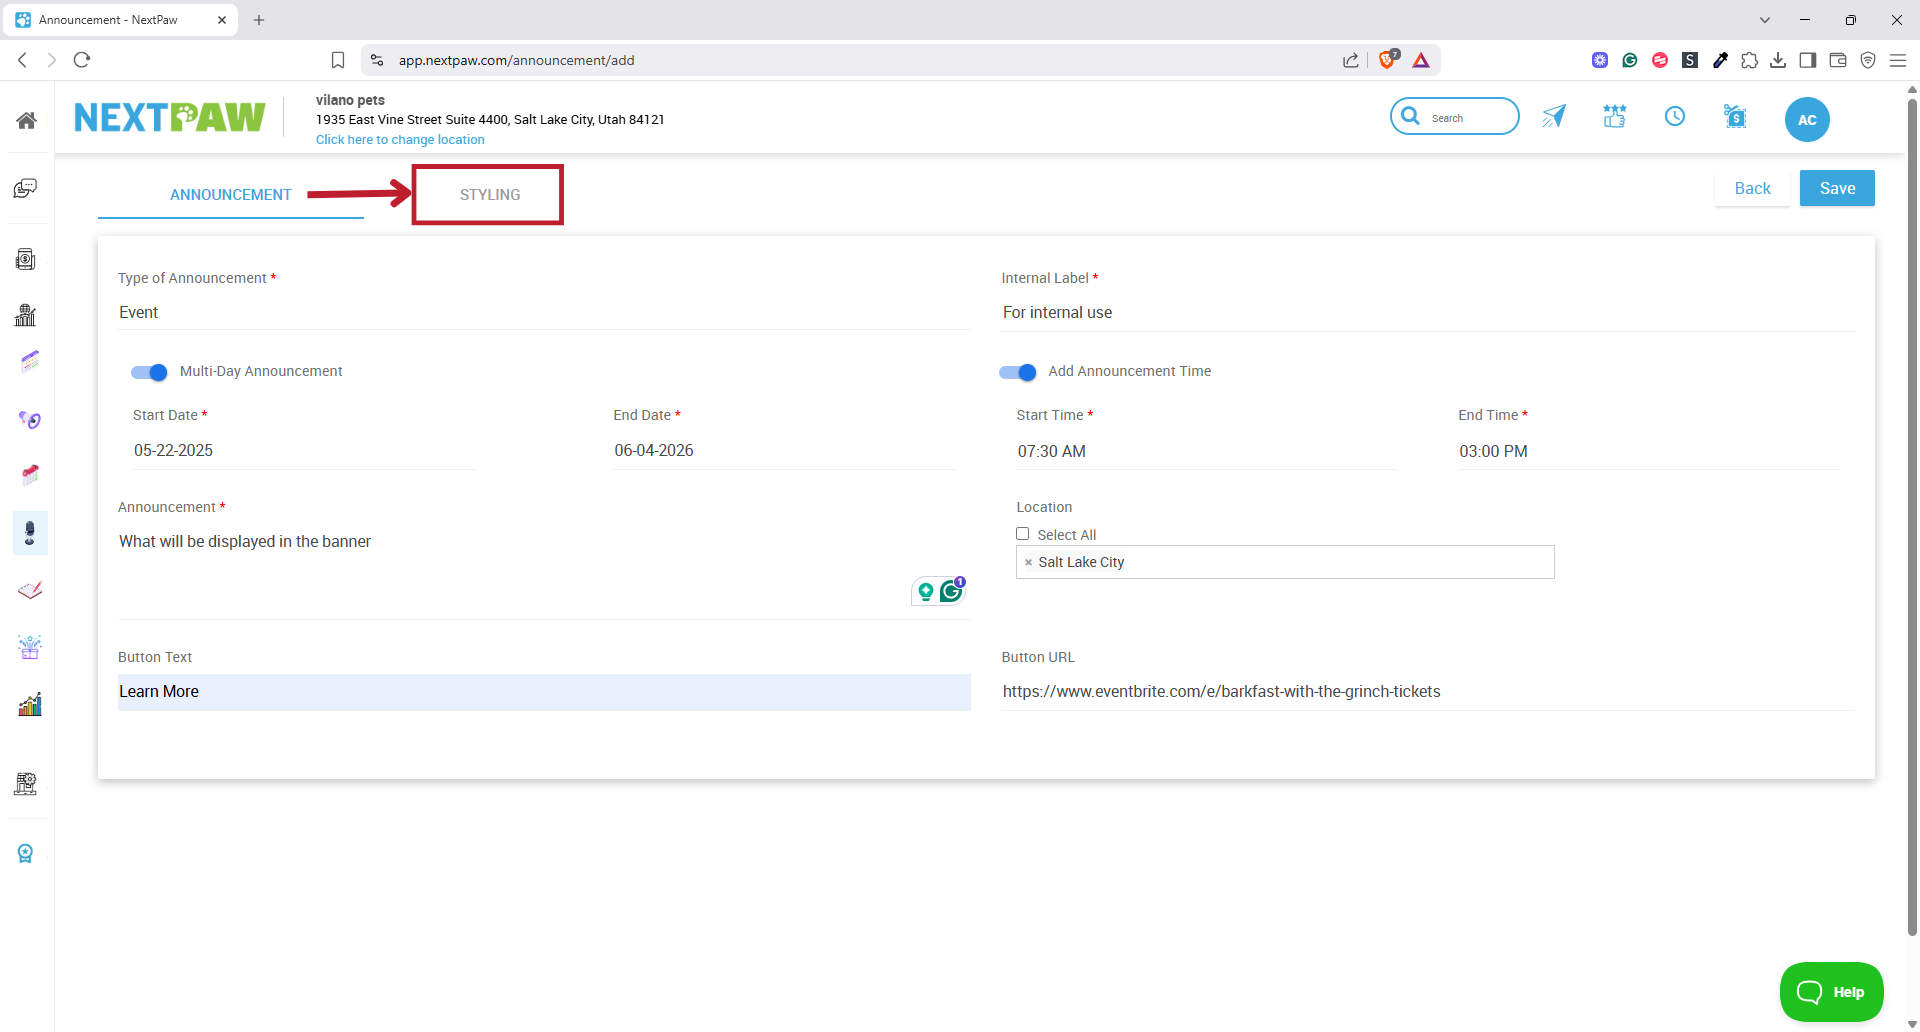
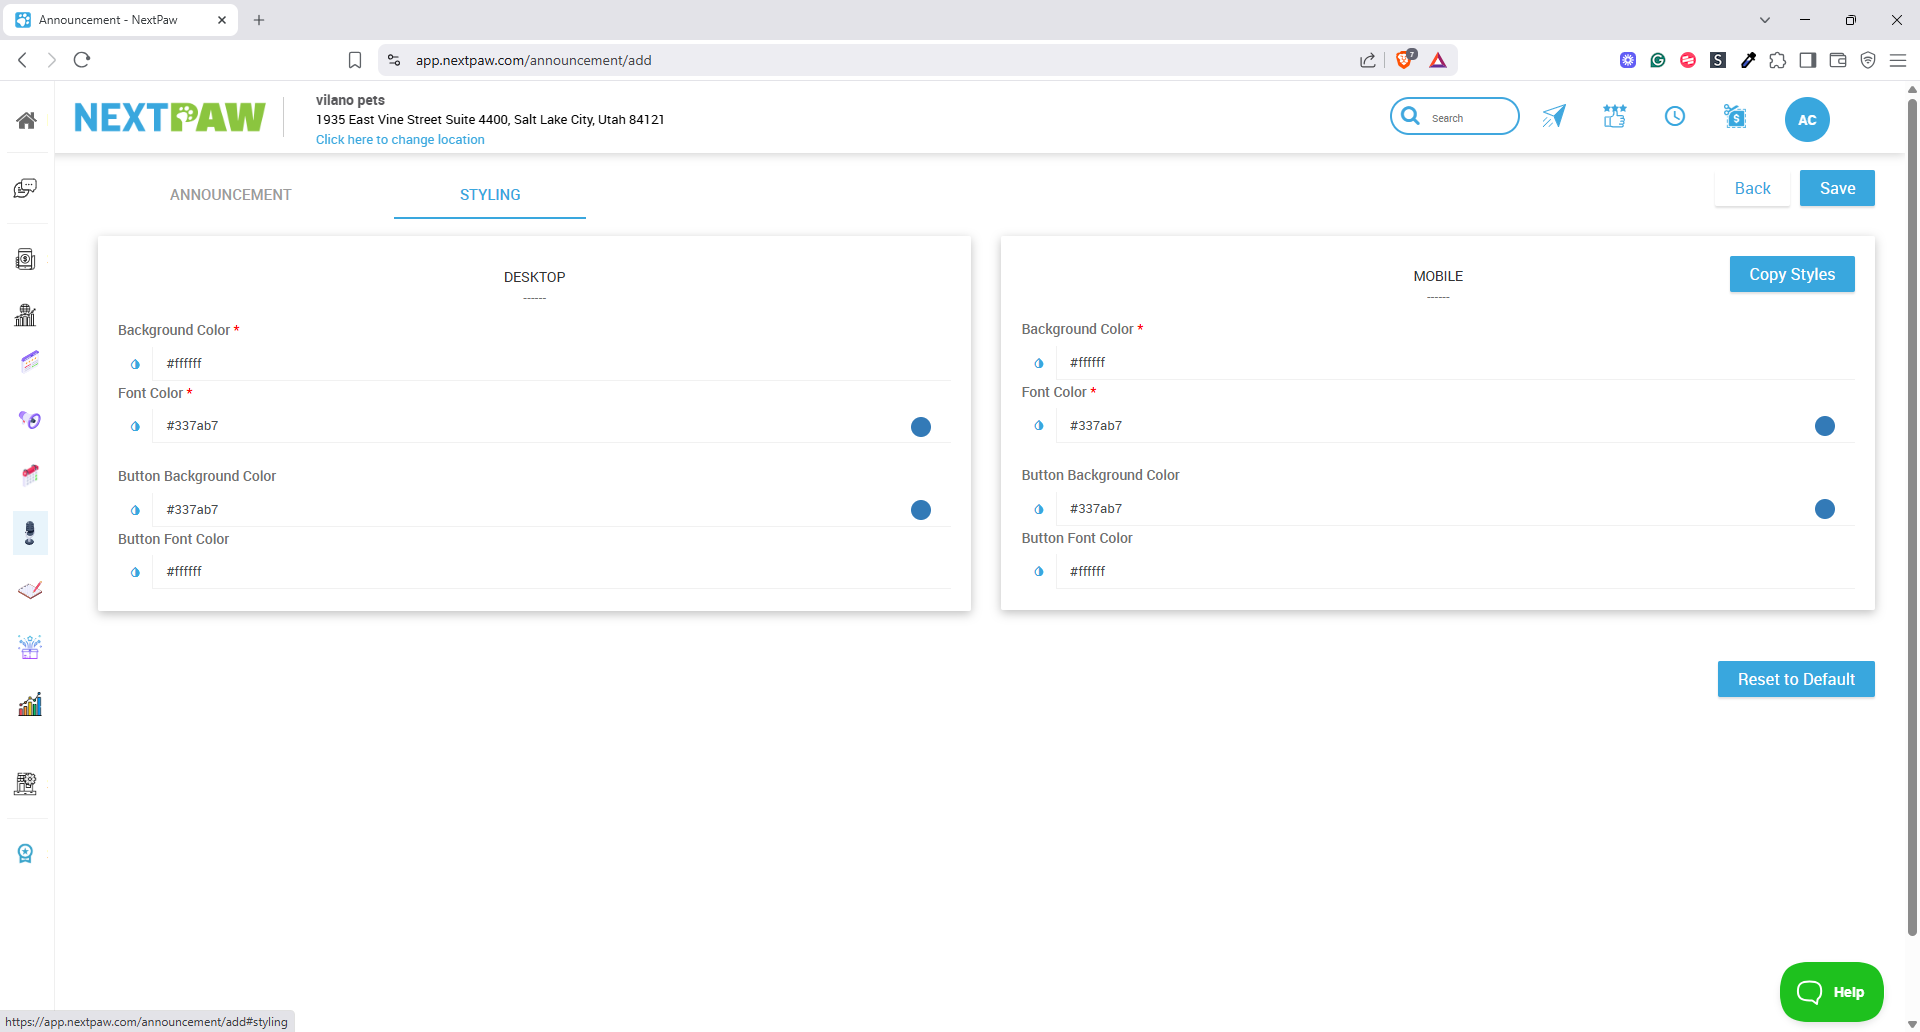
- Customize Banner Styling
- At the top, click the Styling tab.

- Choose a Background Color that fits your brand or the urgency of the message.
- Select a Font Color that provides strong contrast and readability.
- If using a button, select both Button Background Color and Button Font Color.

- At the top, click the Styling tab.
- Save and Publish
- Click Save Changes at the top to publish the banner on your website.

- Click Save Changes at the top to publish the banner on your website.

Final Tips
- Use clear, concise language for faster impact.
- Test banner visibility and contrast on both desktop and mobile.
- Use bright colors for sales, and neutral colors for general info.
- Update or remove expired banners regularly to avoid confusion.
Need Help?
If you encounter any issues, please reach out to us at Support@NextPaw.com.