Scheduling Messages To Send Later
Objective
Automate customer communication by scheduling messages in advance. Use scheduled messages for appointment confirmations, event reminders, waivers, and other important updates.
1. How to Schedule a Message
From Desktop:
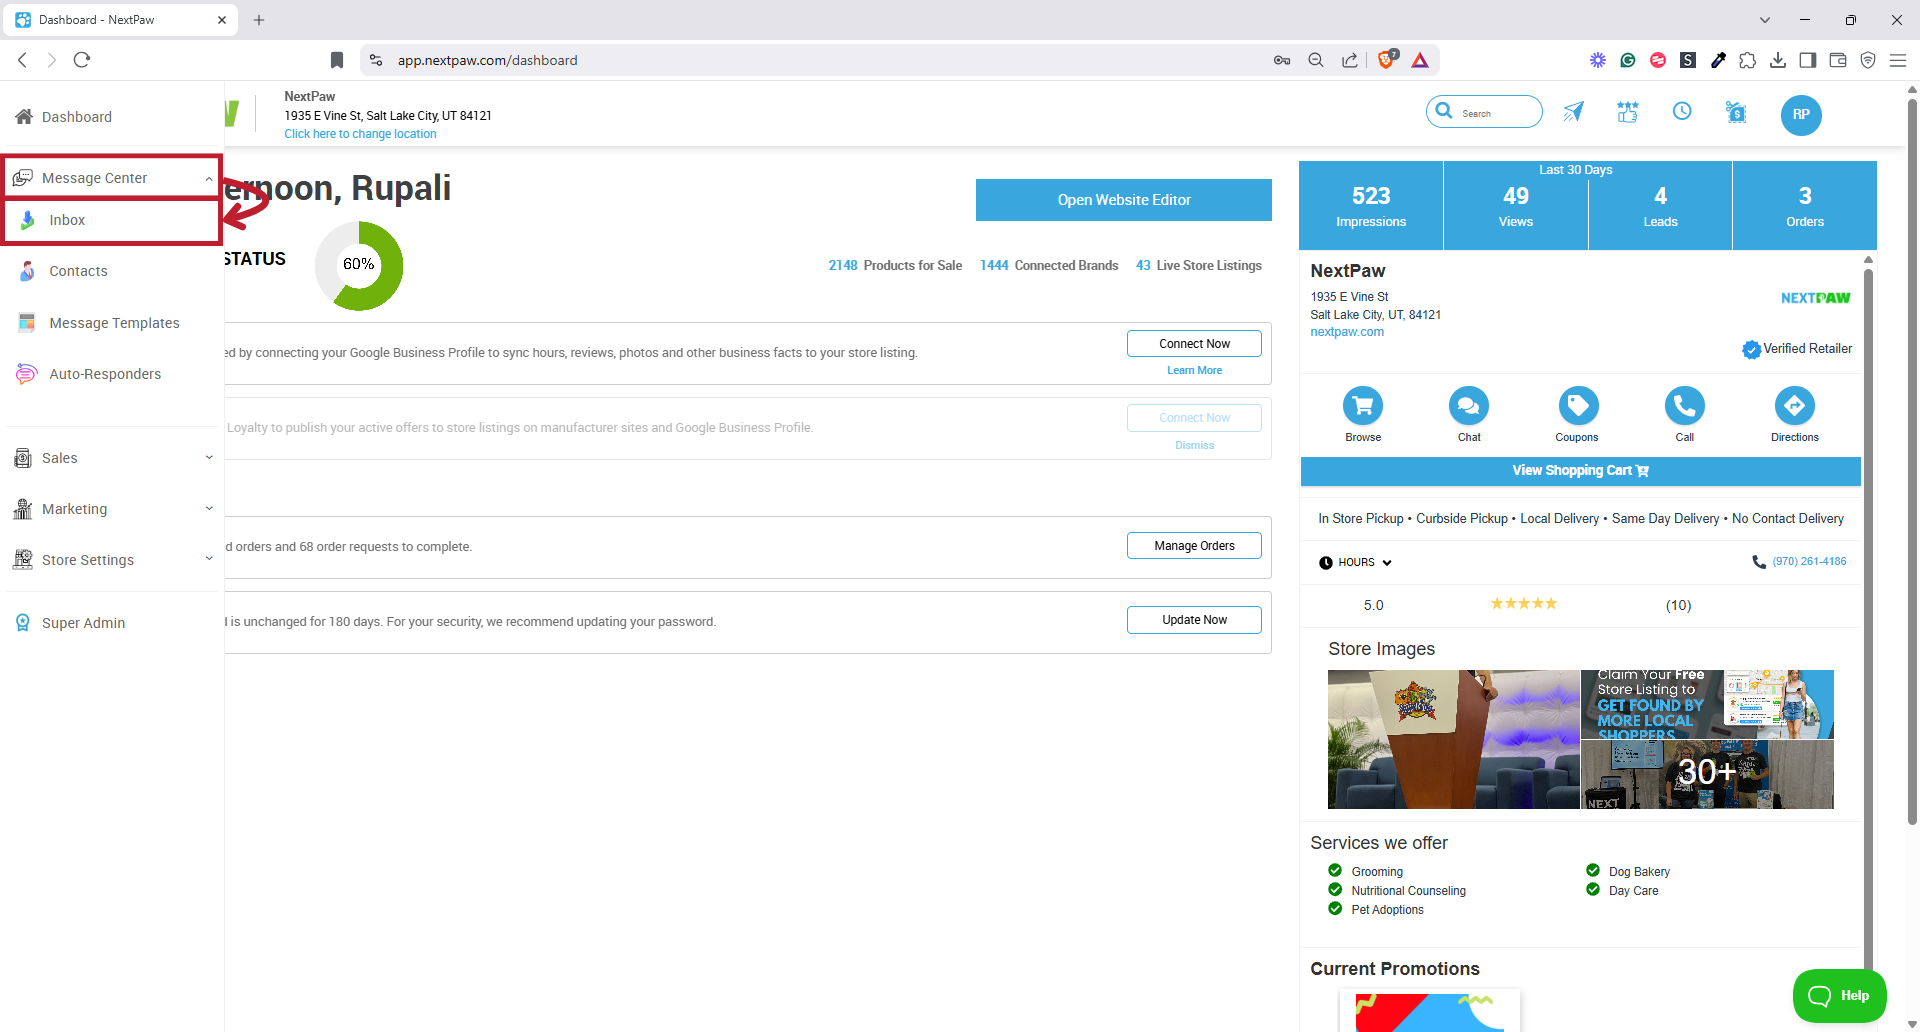
- On the NextPaw dashboard, select Message Center and Inbox.

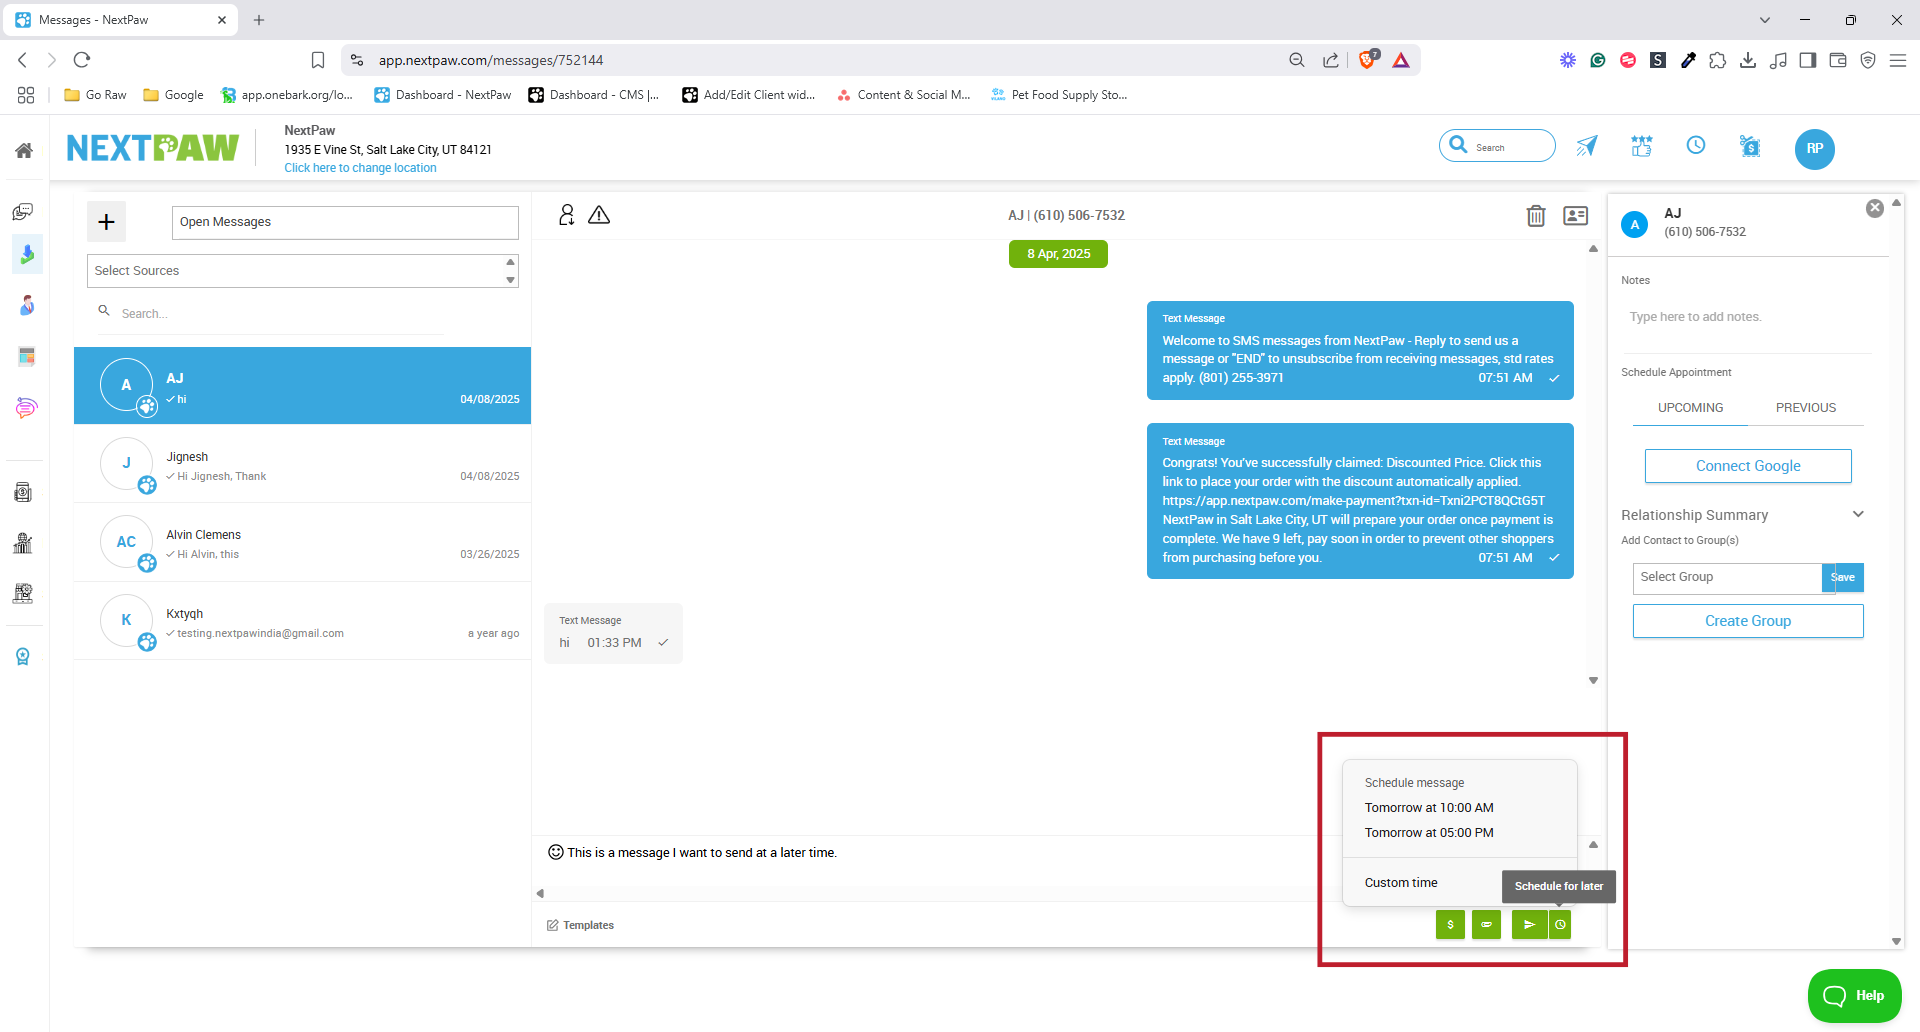
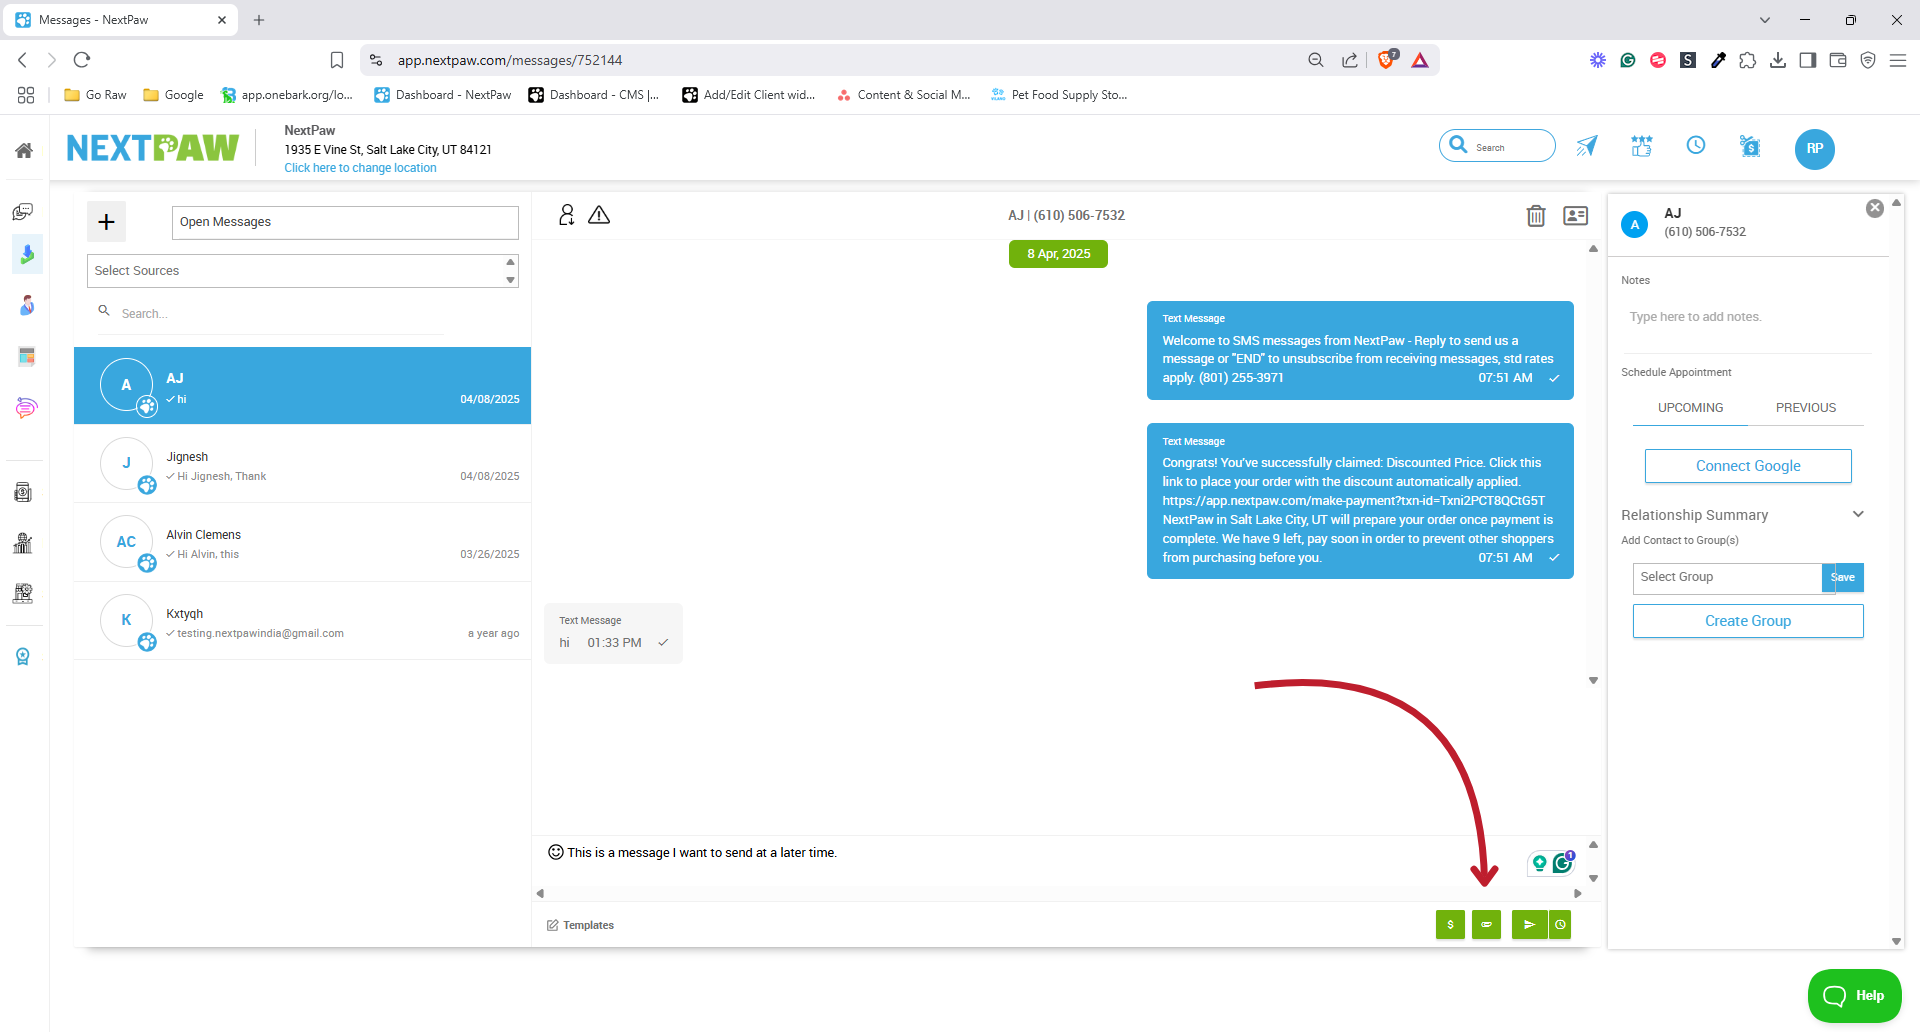
- Open a conversation and write a message or select a message template.
- Select the Schedule for Later button.

- Choose a pre-selected time or click Custom Time to set a specific date and time.
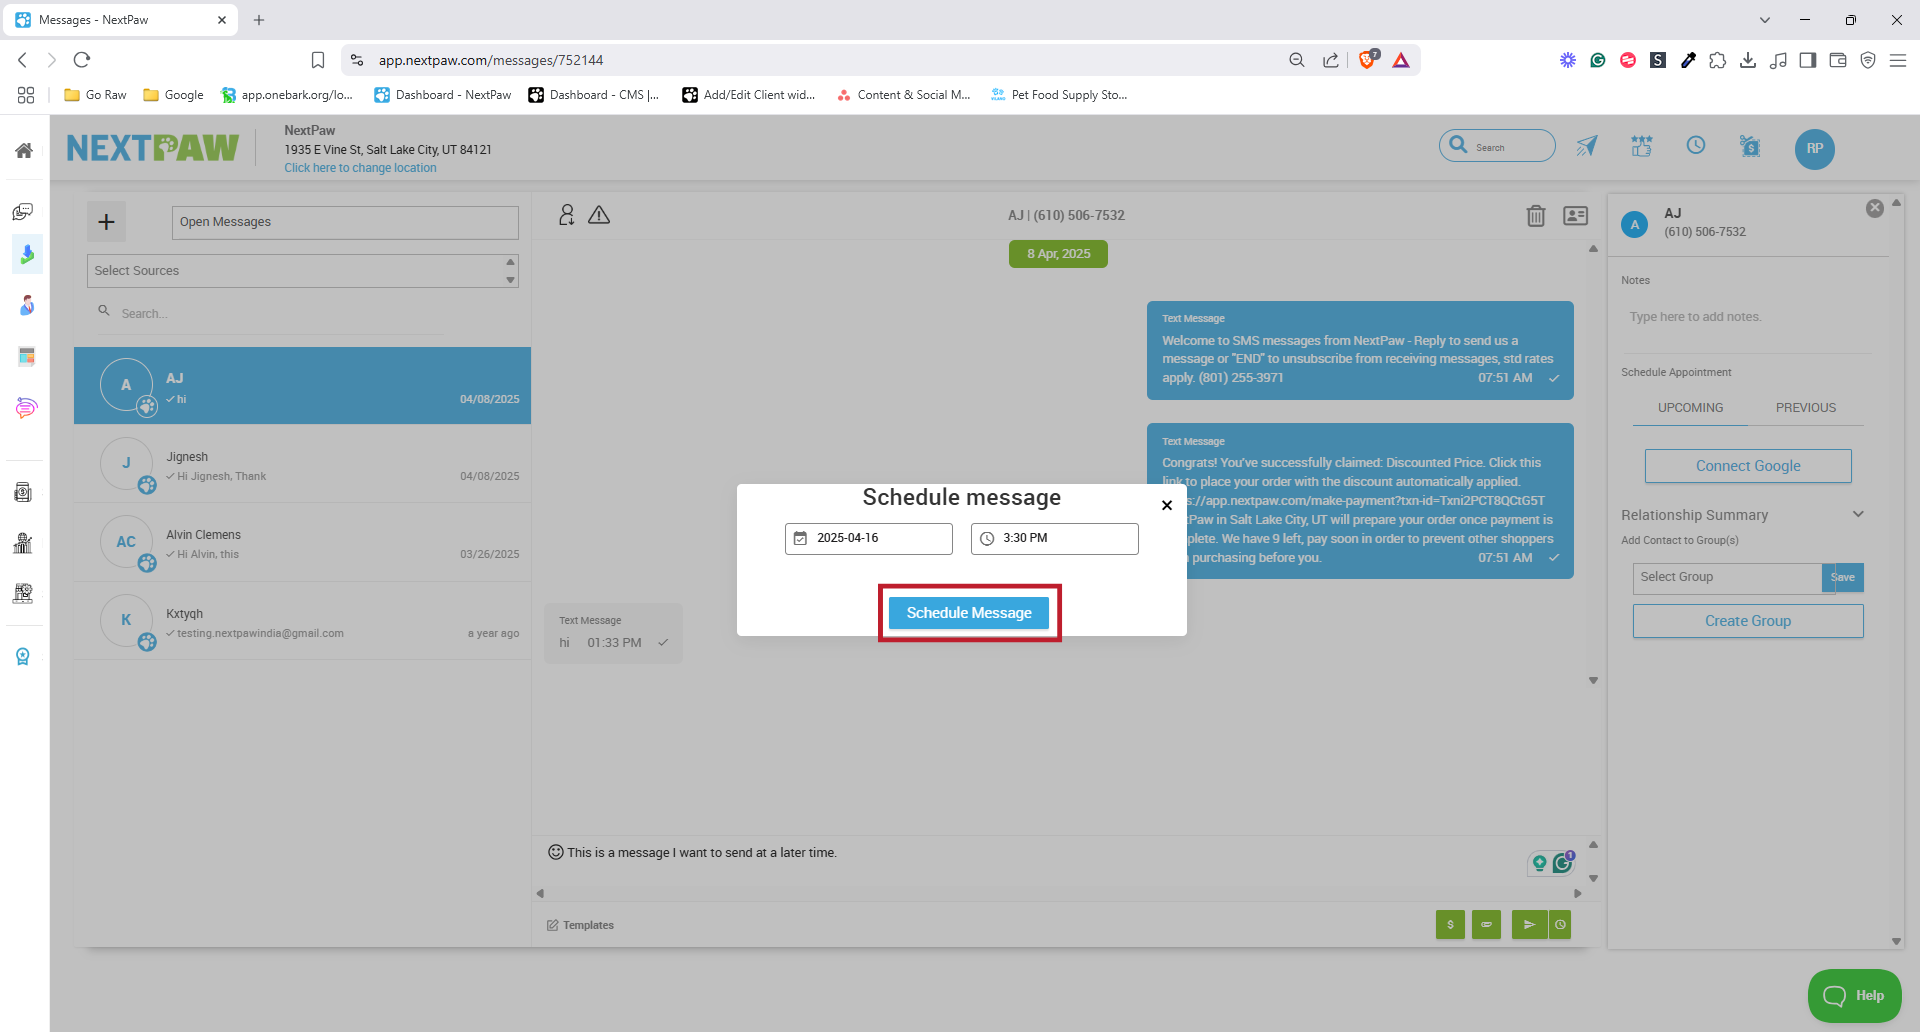
- If selecting Custom Time, enter the date and time, then click Schedule Message.

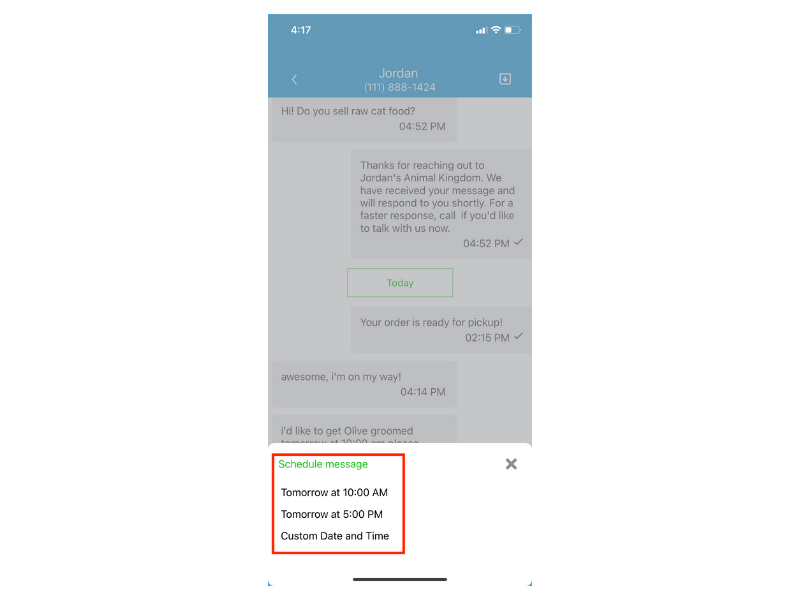
From the Mobile App:
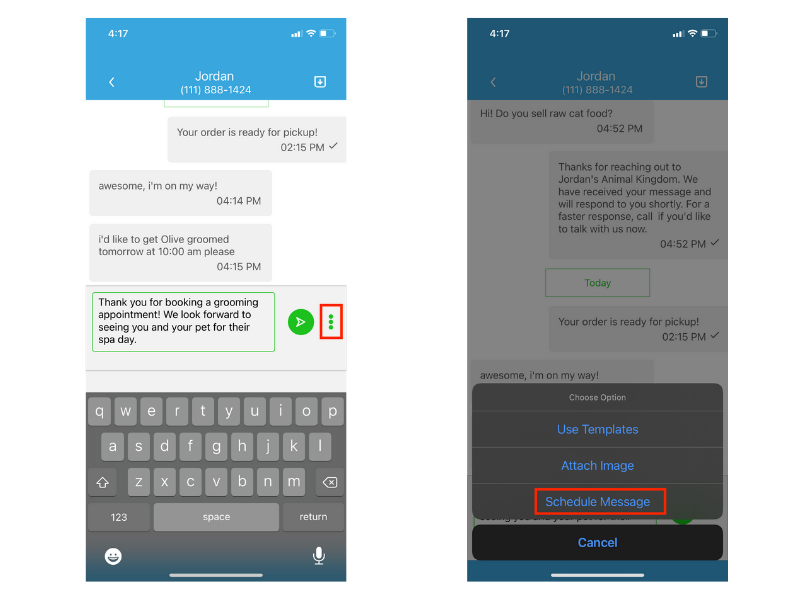
- Open a conversation and write a message or select a message template.
- Tap the three-dot icon and select Schedule Message.

- Choose a pre-selected time or tap Custom Time.

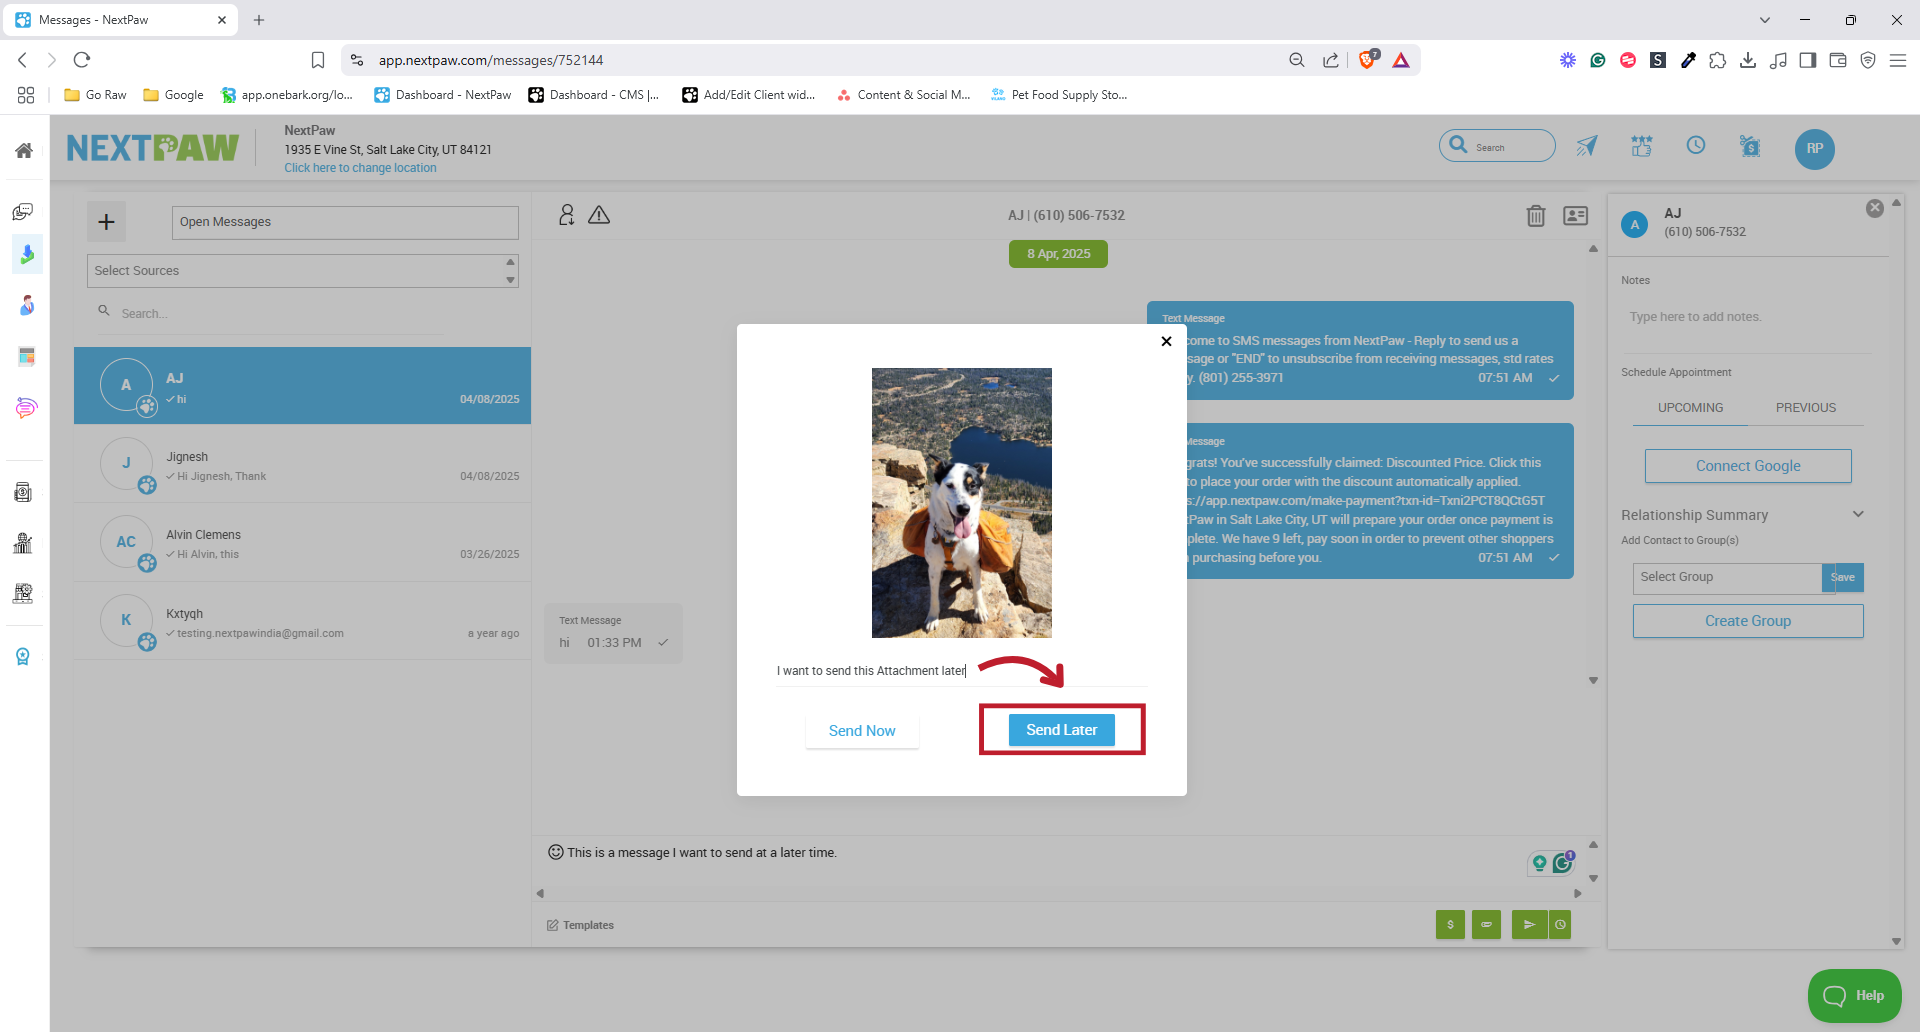
2. Scheduling an Attachment
- Click the Attachment icon.

- Select your file and click Open.
- Add a caption, then click Send Later.

3. Managing Scheduled Messages
- If you need to edit the message or schedule, click the blue pencil icon. Make your edits, then click Update.

- To delete a scheduled message, click the Red Trash Icon.

- You can schedule as many messages as you'd like. Scheduled messages will all be grouped together for a cleaner look.

- To collapse scheduled messages, click Hide.

- Hidden scheduled messages can be shown again by clicking Show.

- Scheduled messages can also be managed in the customer profile conversation view.


💡 SEO Boost
Scheduled messages help ensure customers are reminded about upcoming appointments and events. Timely communication reduces no-shows and increases engagement, which positively impacts your local search rankings through consistent activity and customer interaction.
If you need more help, please reach out to Support@NextPaw.com.