Using Message Templates
Objective:
Save time and streamline communication by creating message templates for common questions, confirmations, and customer interactions. This guide will show you how to set up and use templates in NextPaw to respond quickly and consistently.

⚠️ Note:
NextPaw’s messaging system is designed for one-to-one communication. Mass texting is not supported. Review requests should be sent individually to maintain compliance and personalization.
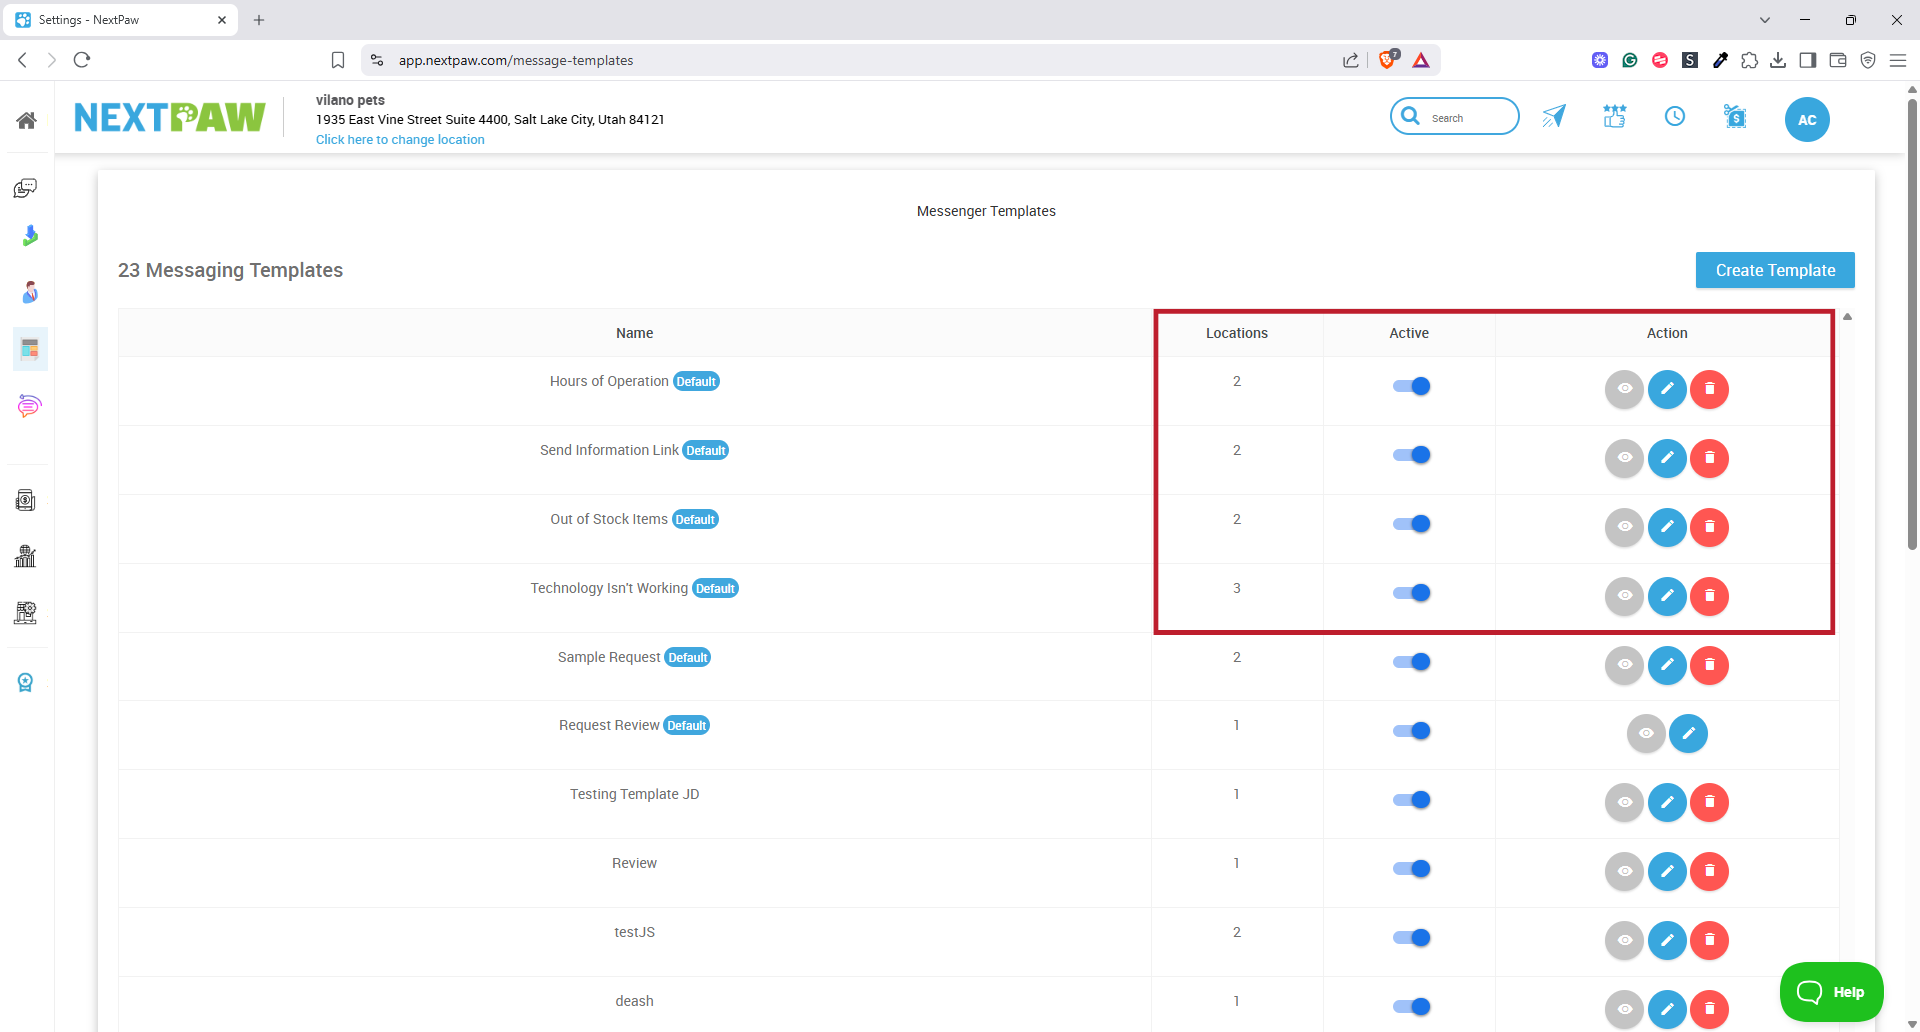
1. Message Template Types
Default Templates
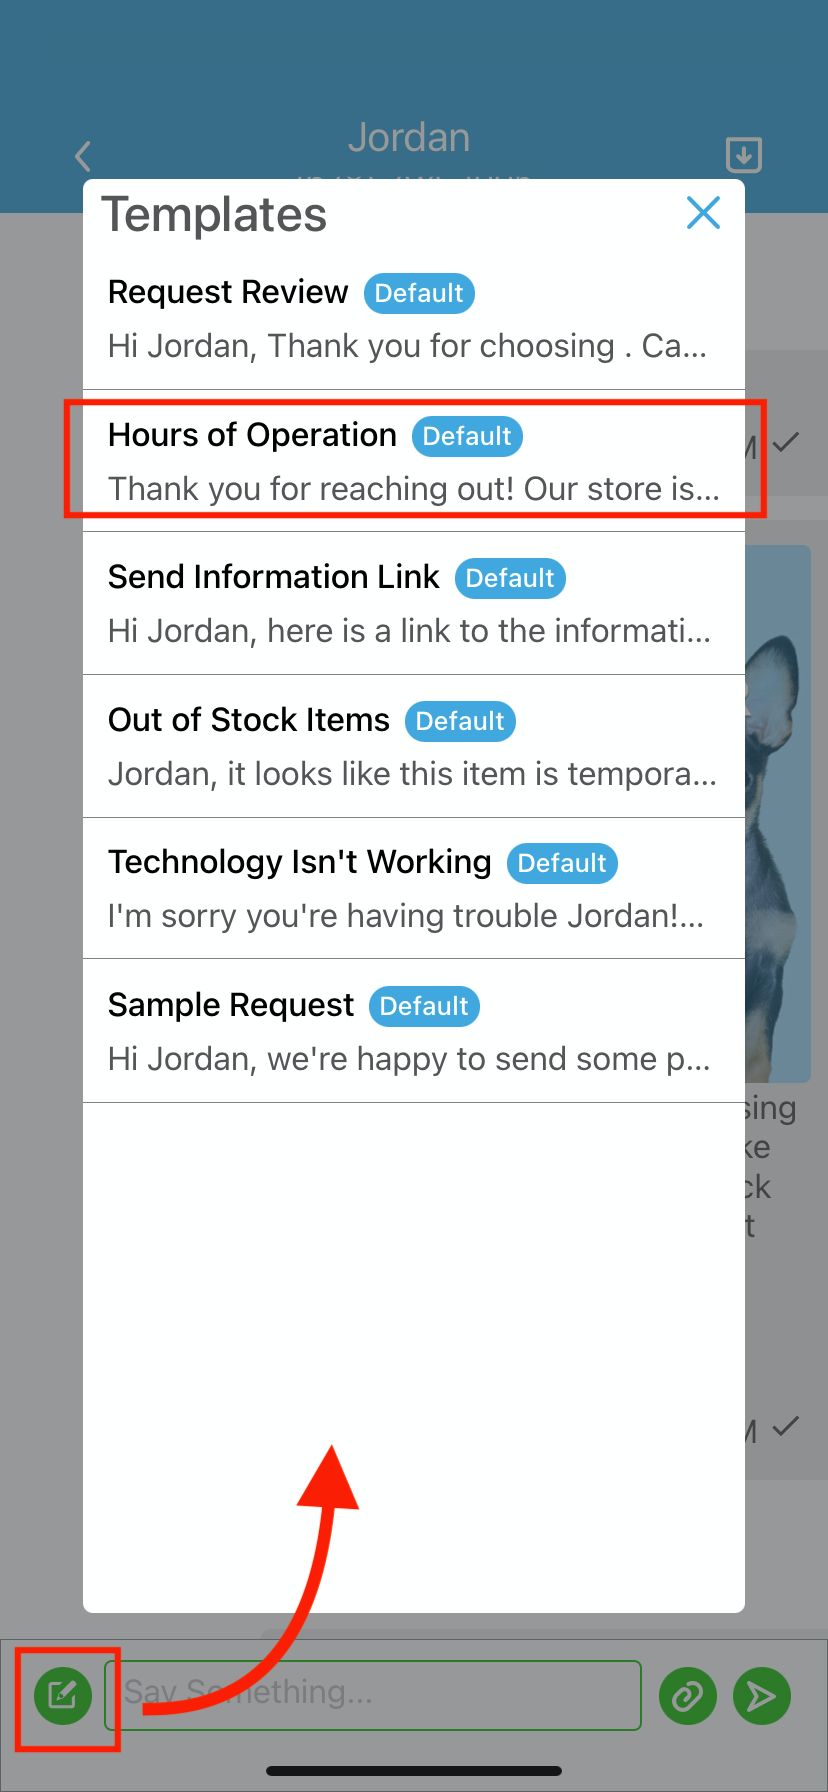
NextPaw provides pre-made templates to help answer common customer inquiries, including:
- Hours of Operation
- Product Samples & Recommendations
- Information Requests
- Review Requests
To access default templates:
- Click the Templates button within any message.
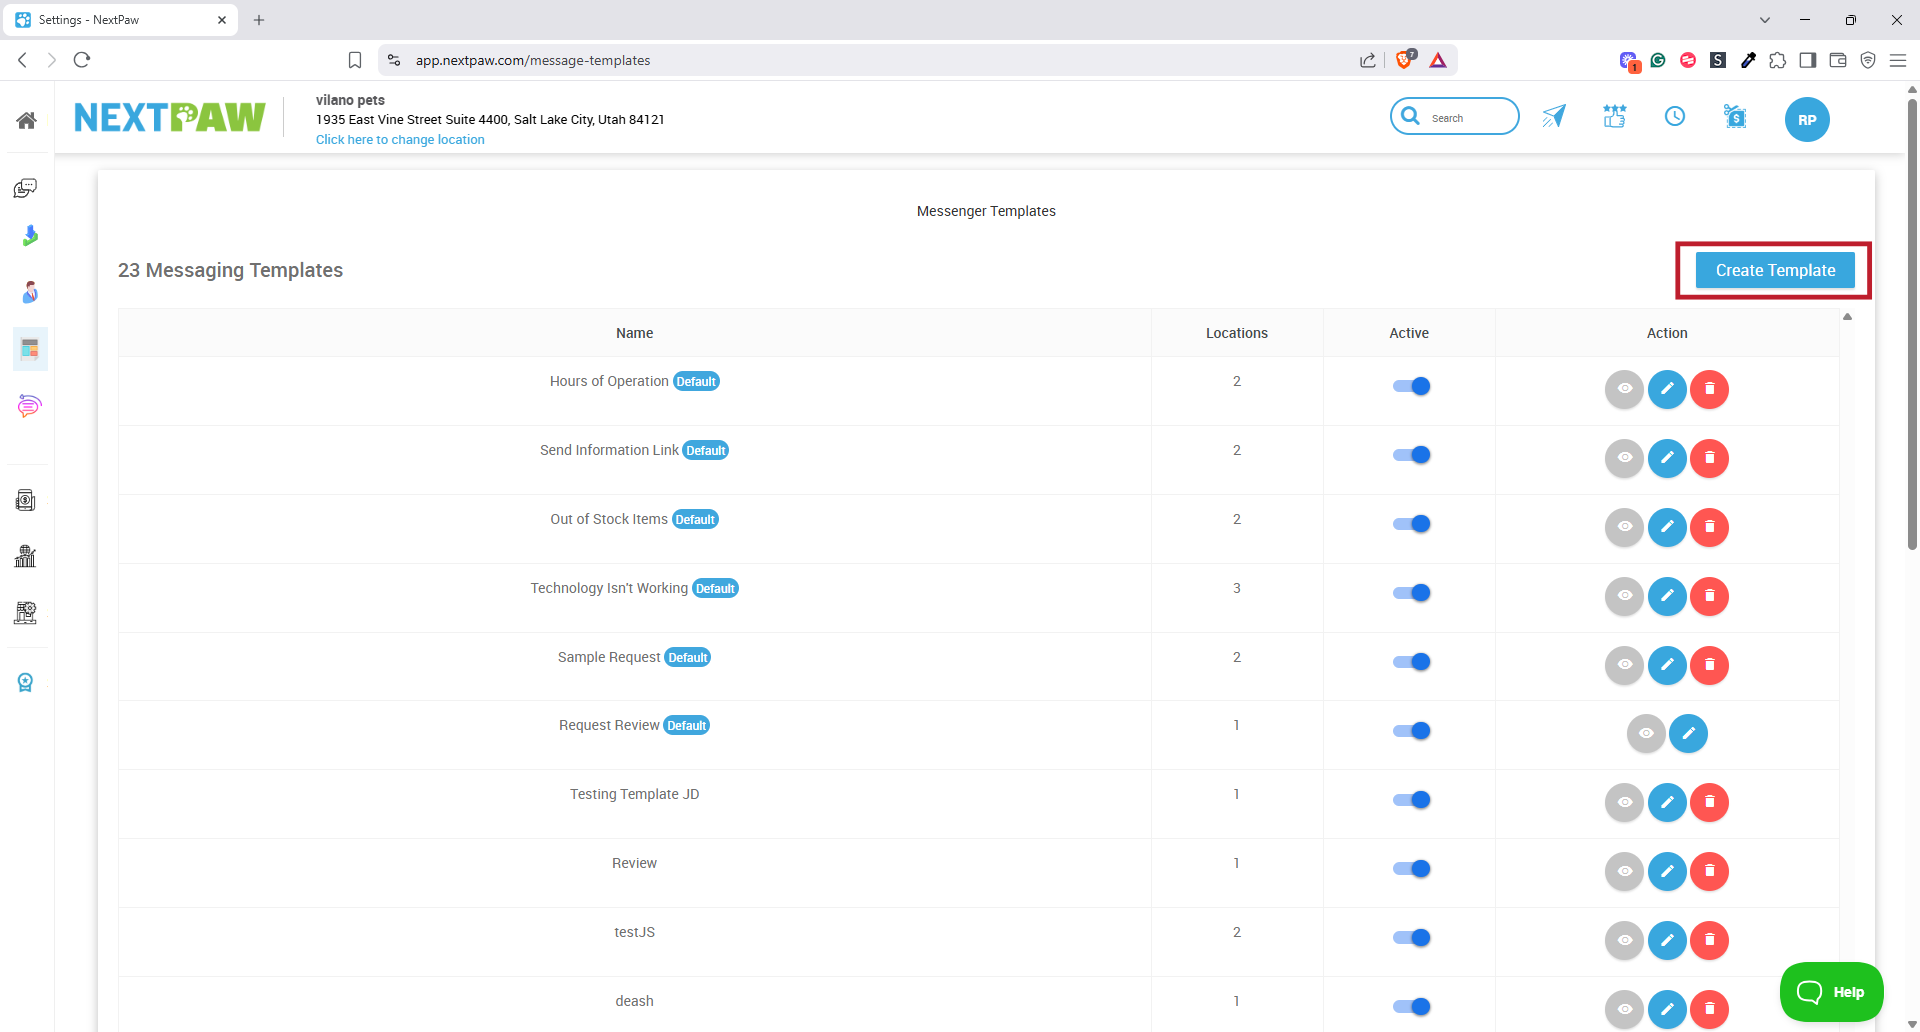
- Navigate to the Templates section in the Dashboard Settings.
Custom Templates
Customize your messaging by creating templates tailored to your business's needs. Consider adding templates for:
- Frequently Asked Questions
- Appointment Confirmations
- Upcoming Event Details
- Booking Reminders
- Special Orders
To manage custom templates:
- Click the Templates button within a message.
- Visit the Templates section in Dashboard Settings.
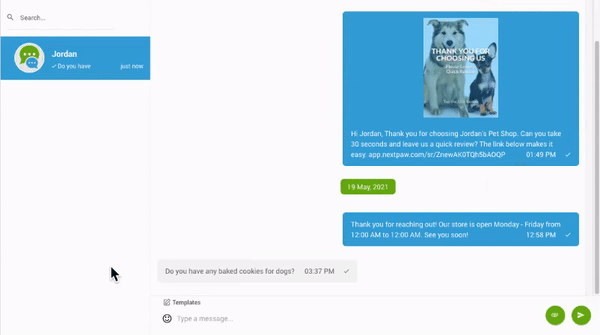
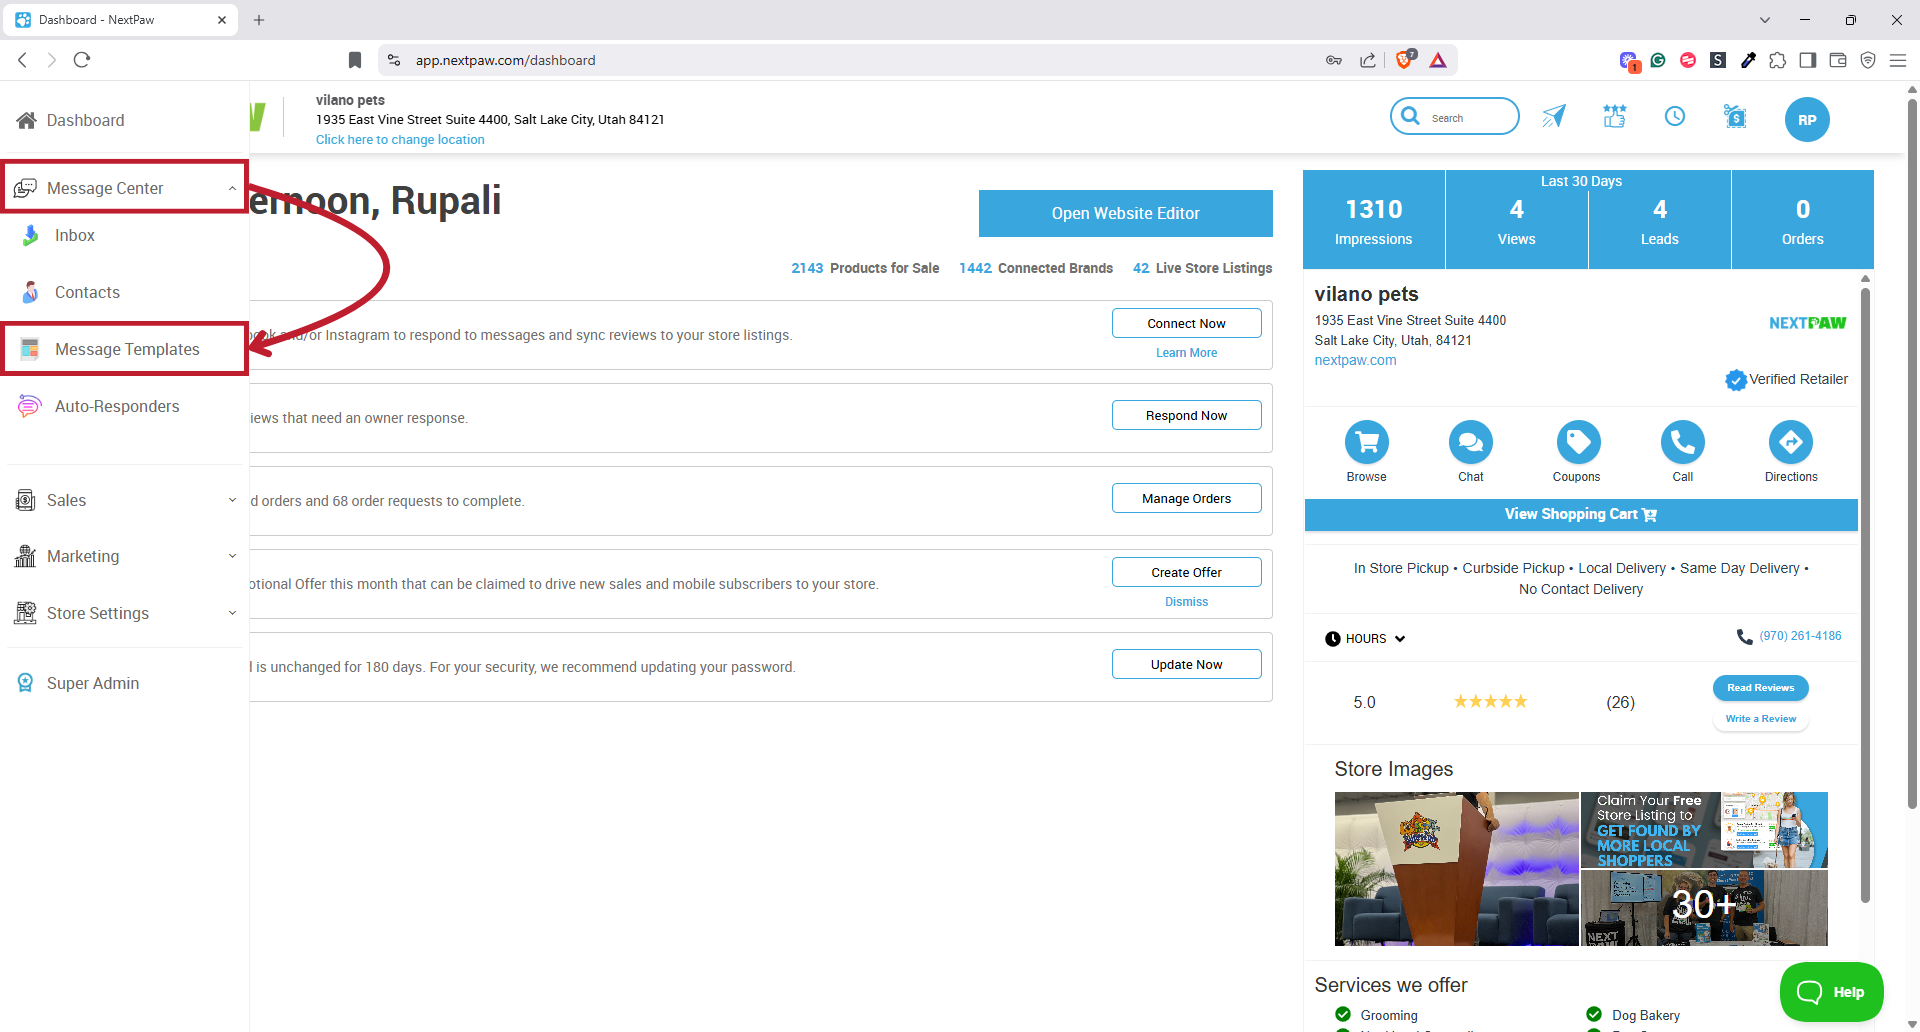
2. Using Message Templates
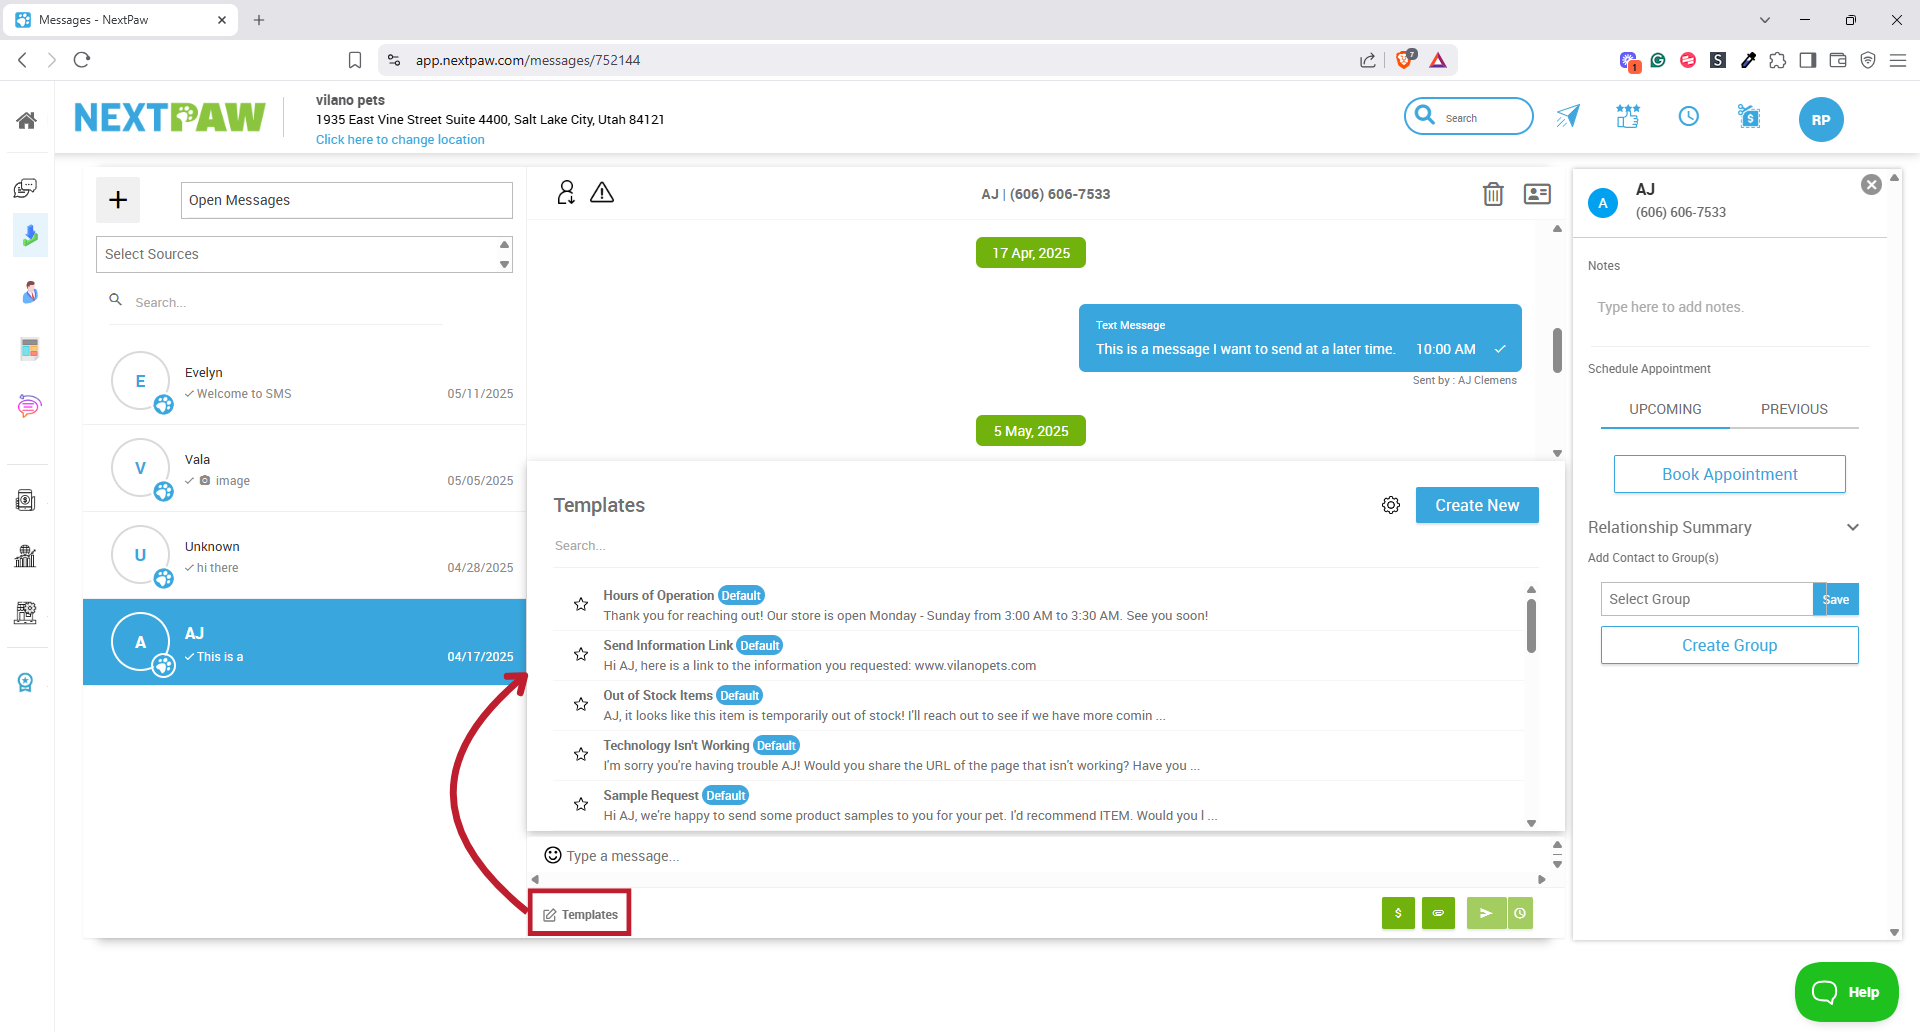
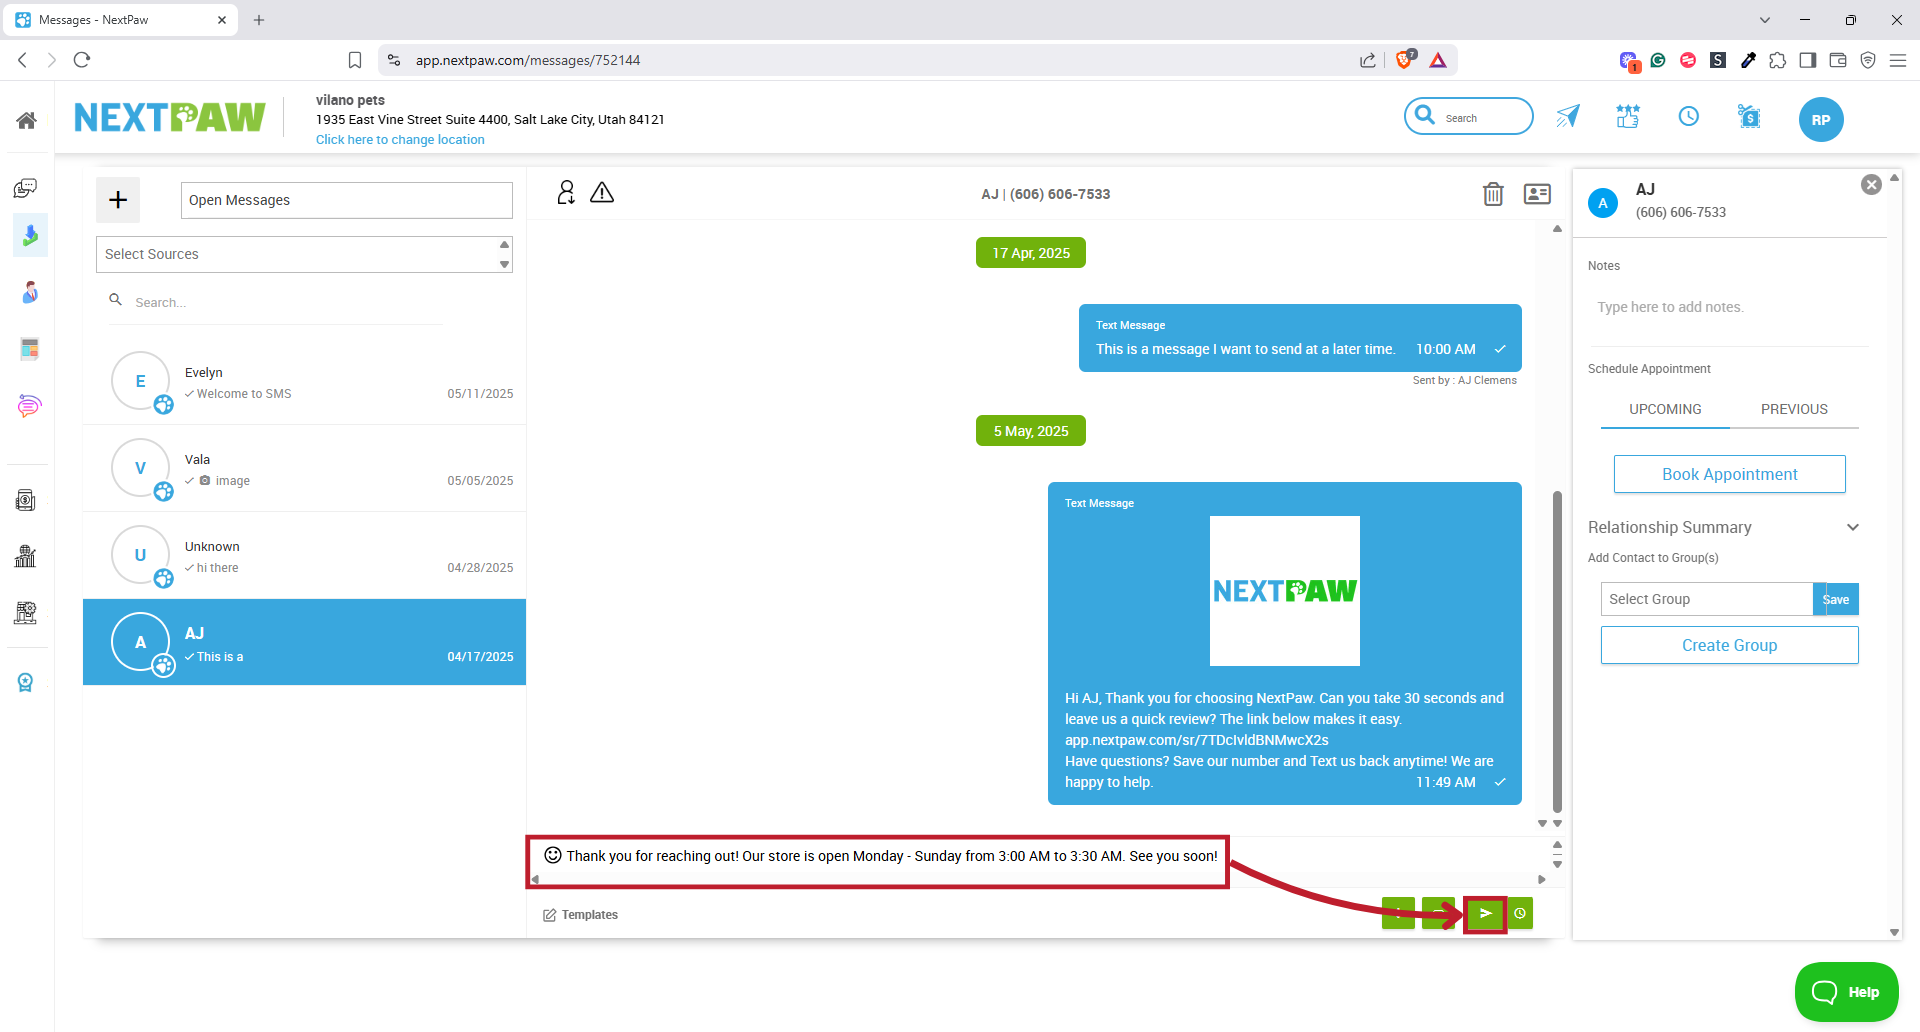
To send a message template:
- Select the Message Center, then the Inbox Tab.

- Select the user you are reaching out to, then the Template button.
- From the template menu, select the template you would like to use.
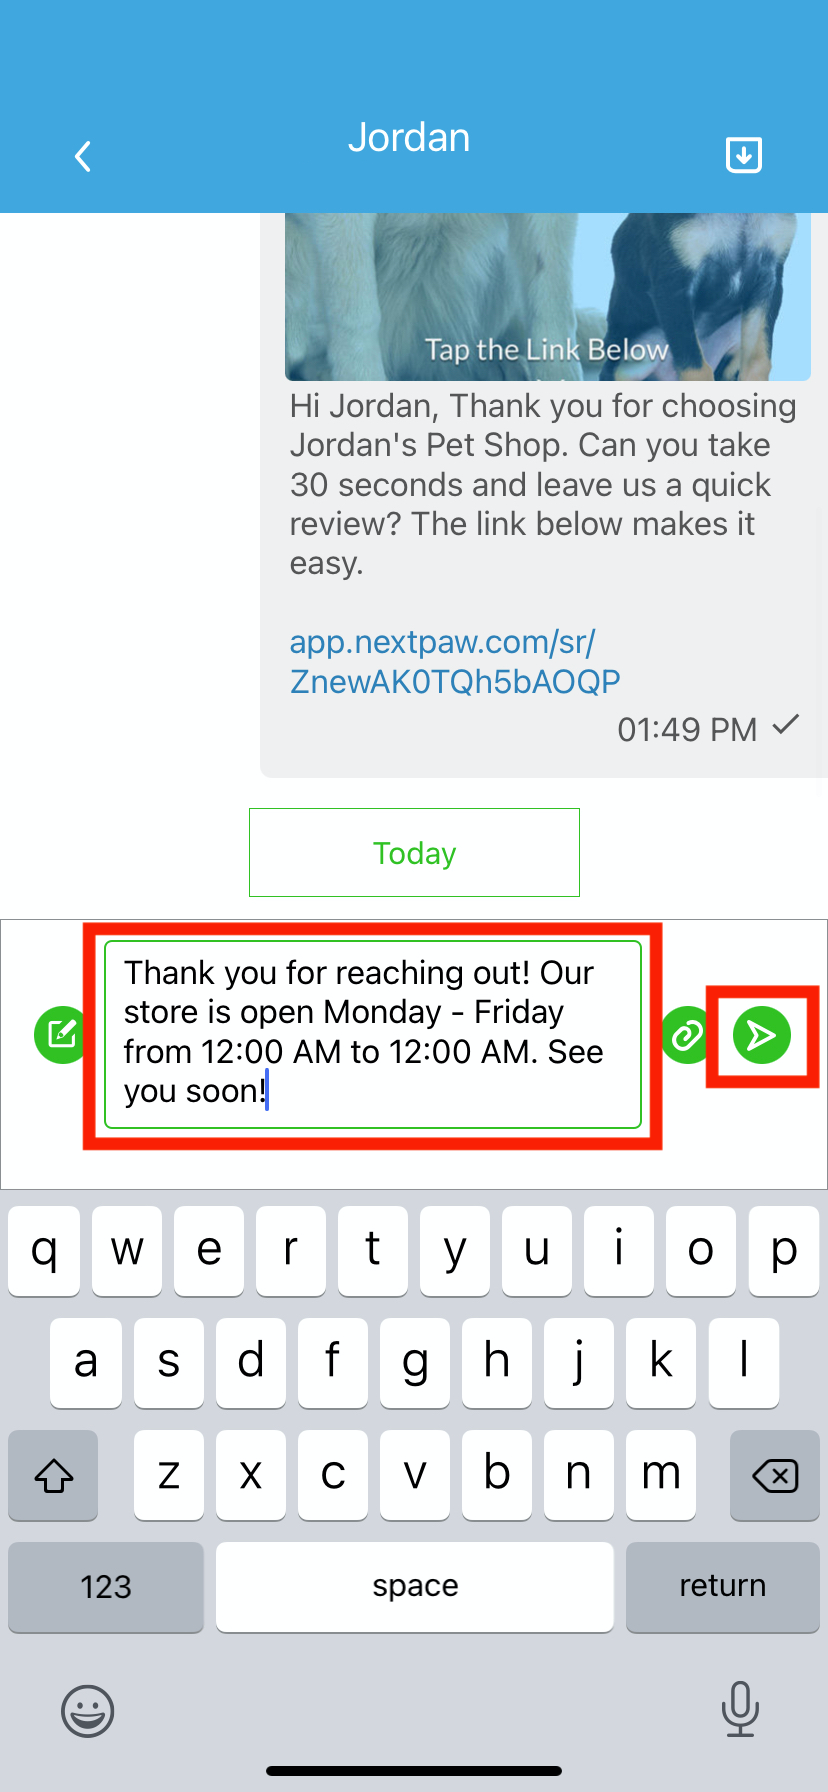
- The template will auto-populate in the message box—add any extra details or links.

- Click the green arrow button to send.

Mobile Users:
Access templates in the NextPaw Mobile App by tapping the Templates button at the bottom left of a message.
- The template will automatically populate in the message box. Include any extra information, links or details needed, then tap the green arrow button to send.

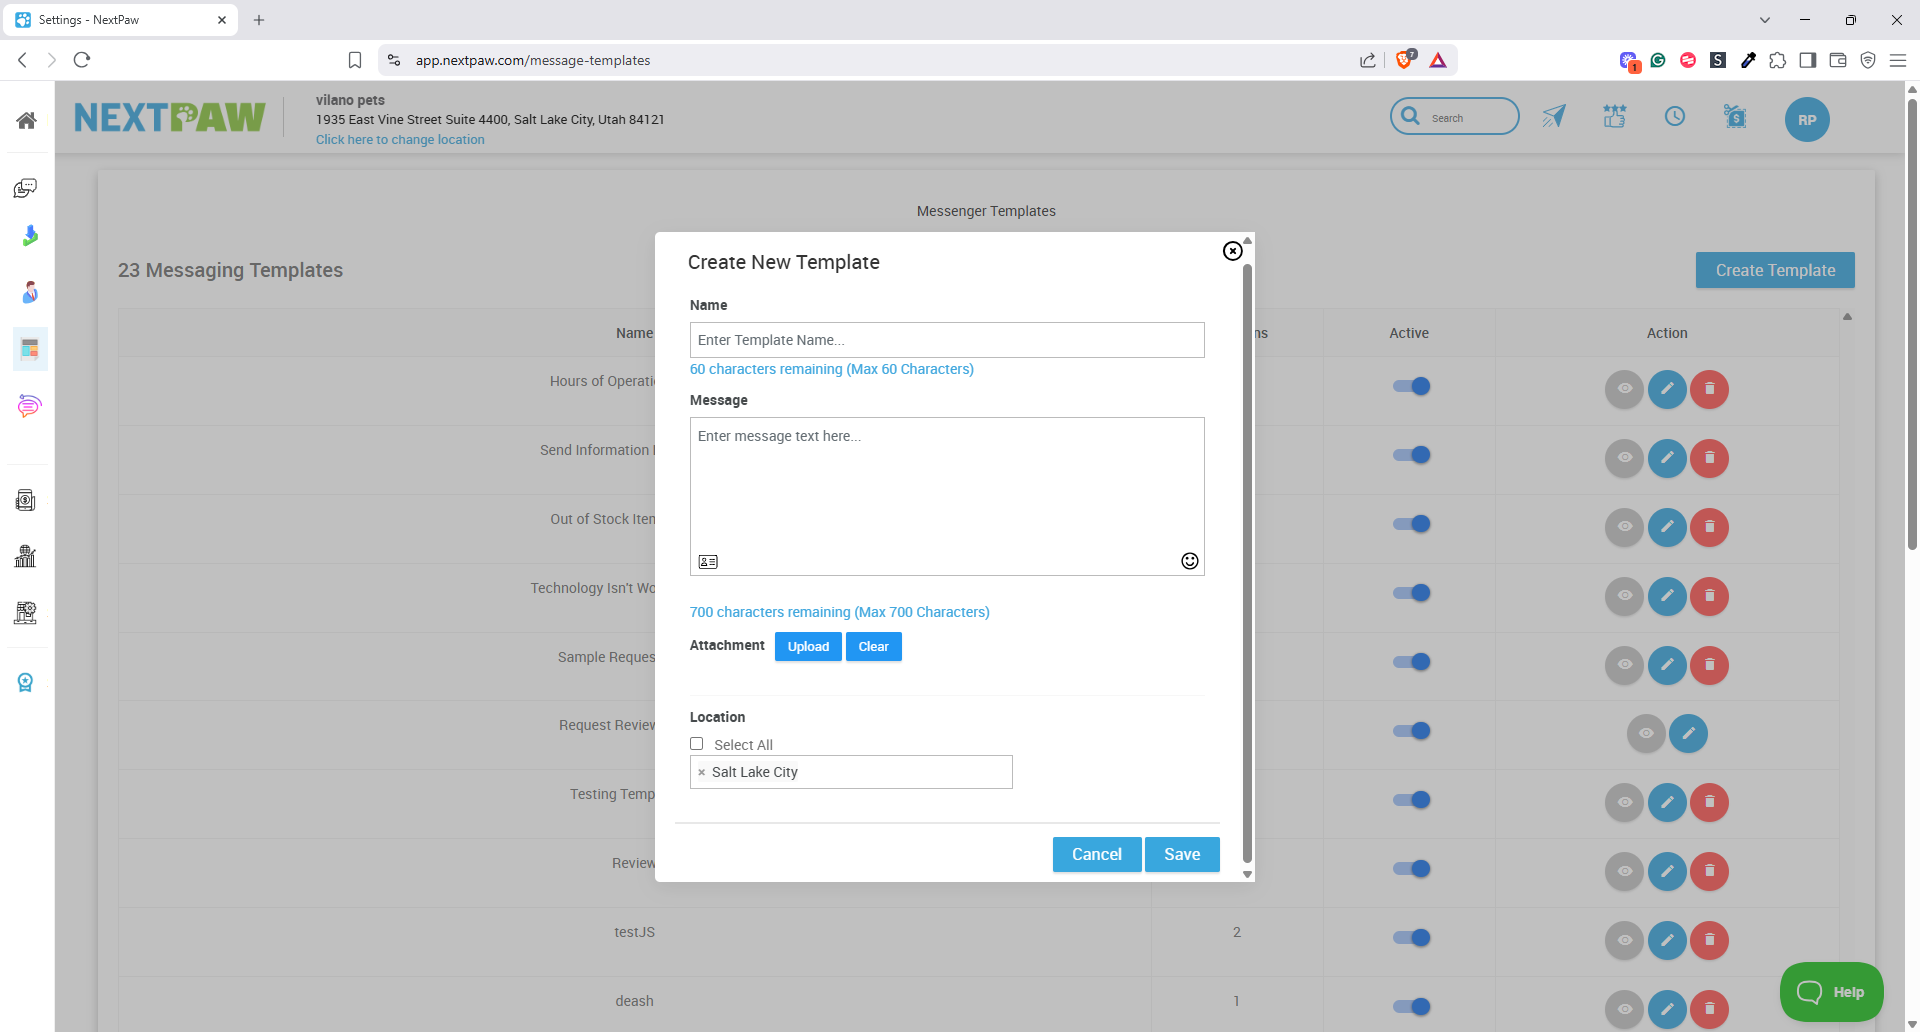
3. Creating a Custom Template
- Select the Message Center, then the Message Templates Tab.
- Click the Templates button within a message and select Create Template.

- Name your template (the name will not appear in the message).
- Enter your template message.
- To add personalized information, click the information card icon and select a tag (e.g., customer name, business details).
- (Optional) Upload a photo—this is useful for including images of services, products, or contracts.
- Click Save.

Your new custom template will now appear in the Templates section of the Messenger and dashboard settings.
4. Managing Your Message Templates
- Use the search bar in the Templates selector to find templates by name or keywords.
- Edit, clone, or delete custom templates in the Dashboard Settings under Templates.
- Default templates cannot be edited or deleted, but can be cloned for personalization.