Customizing Your Webchat Widget
Objective
With NextPaw's Webchat Widget, you can easily customize its appearance to align with your brand's look and feel. This feature allows you to change the widget's colors, icons, and text, as well as adjust its position on your website. You can maintain brand consistency across all communication channels by customizing the Webchat widget.
How to Customize Your Webchat Widget
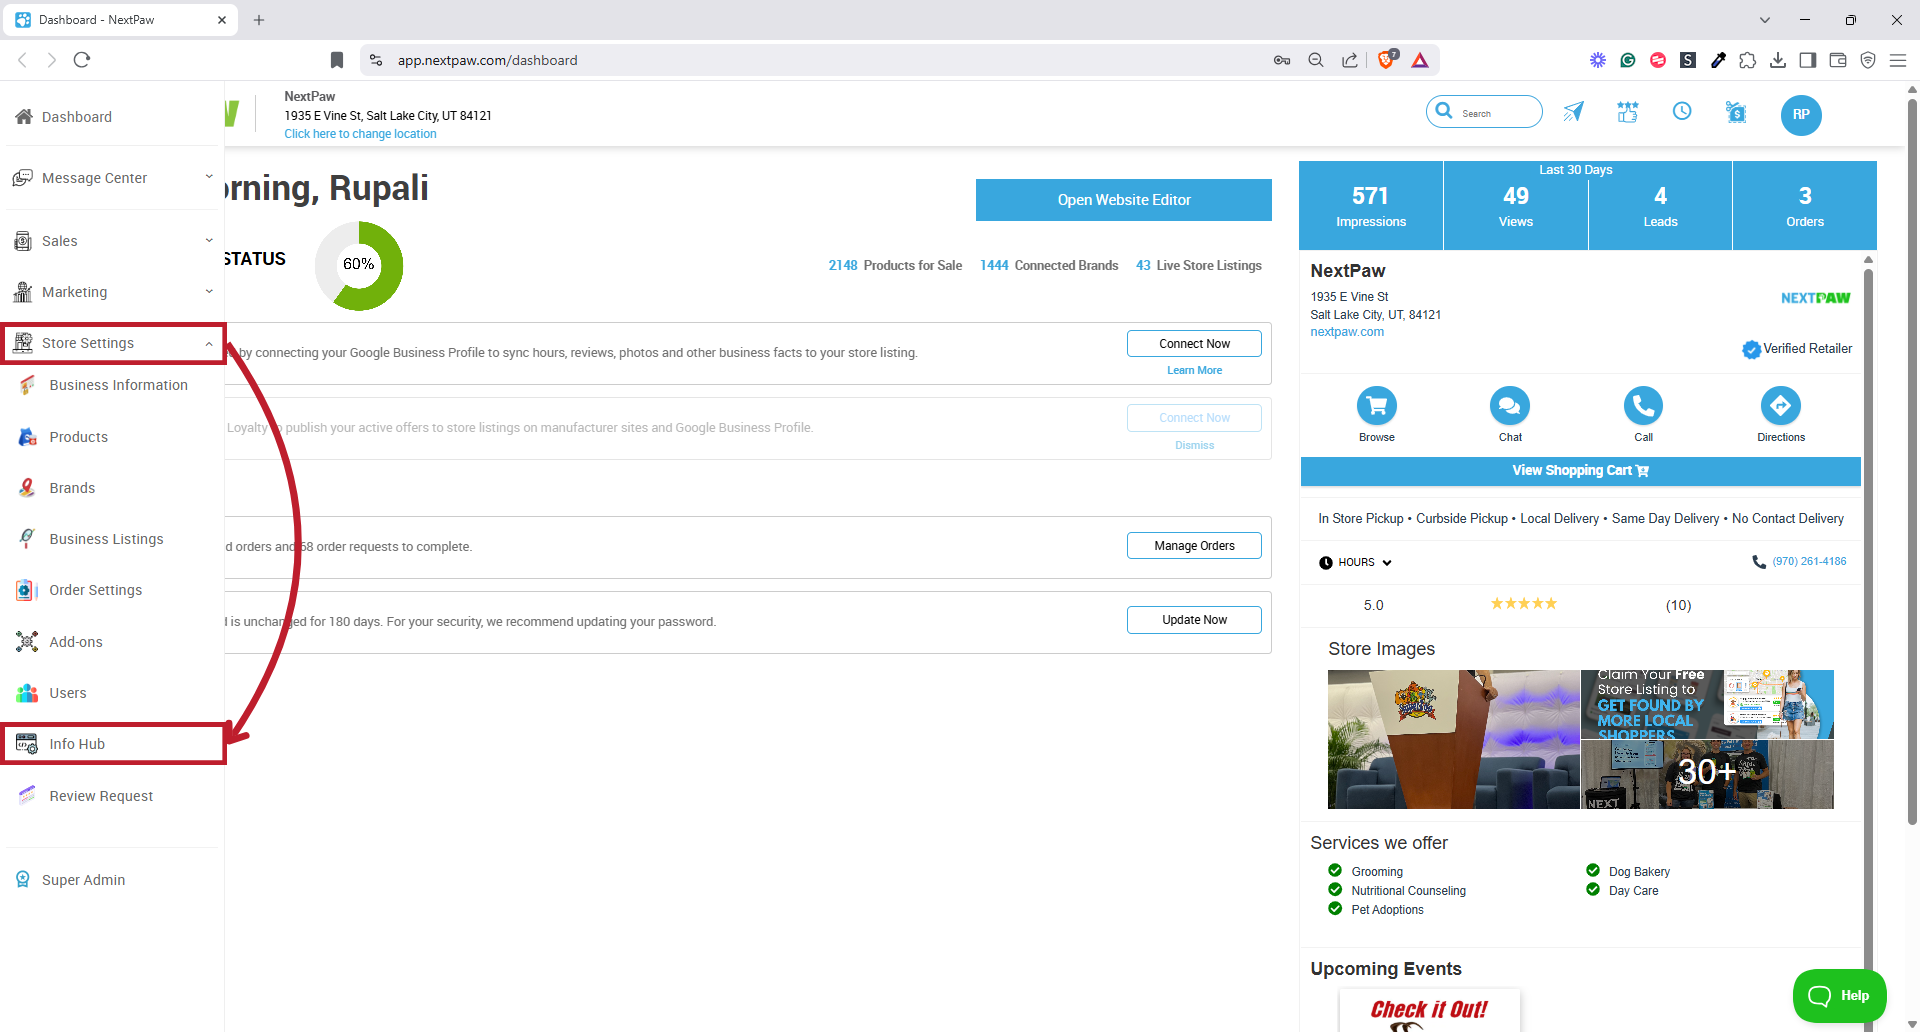
- Click the Store Settings tab and select Info Hub.

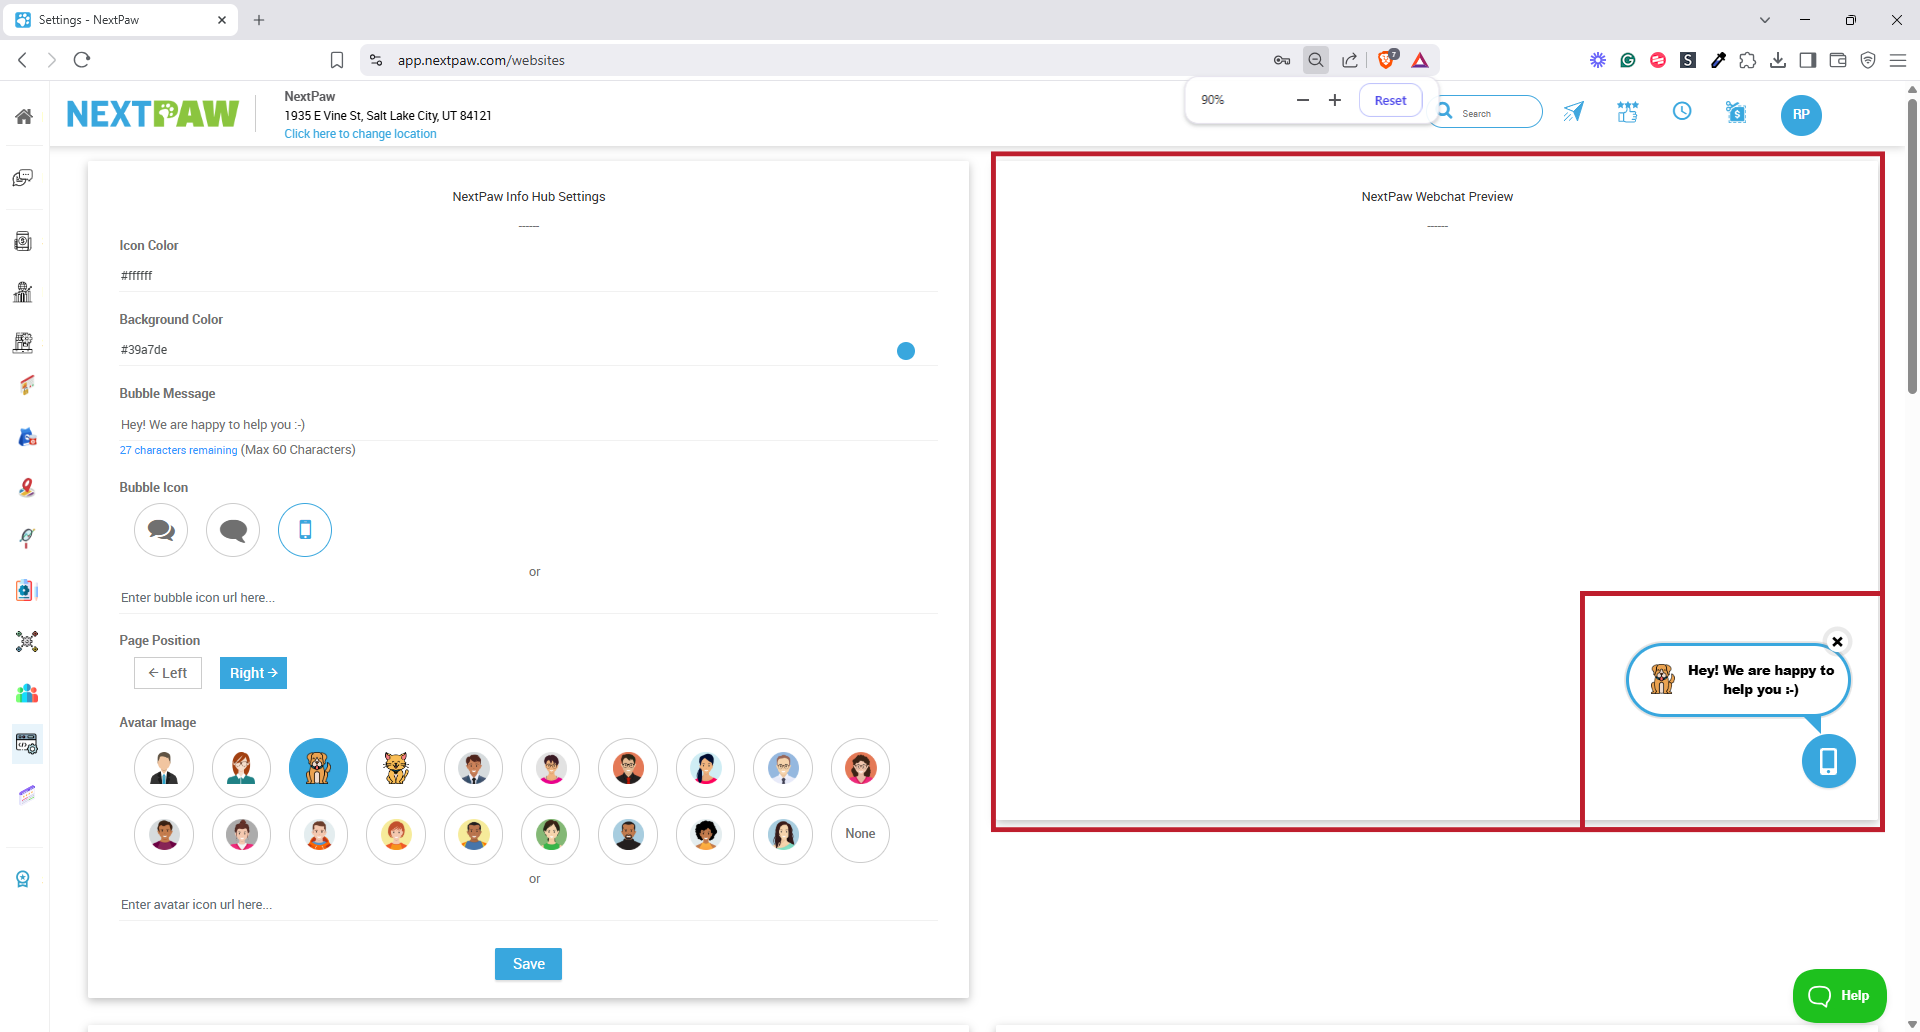
- In the Preview section on the right side of the screen, you will see all changes reflected in real-time before applying them to your website.

- To update your widget's appearance:
- Change the icon or background color by selecting a color or adding the color code.
- Enter a greeting text in the Bubble Message field. This is the text displayed on the bubble before it's clicked, and it's a great place to get creative and customize it for your business.
- Select the bubble icon you like for your Webchat Widget.
- Choose the position where you want the widget to appear on your website.
- Change your avatar image that displays within the widget.
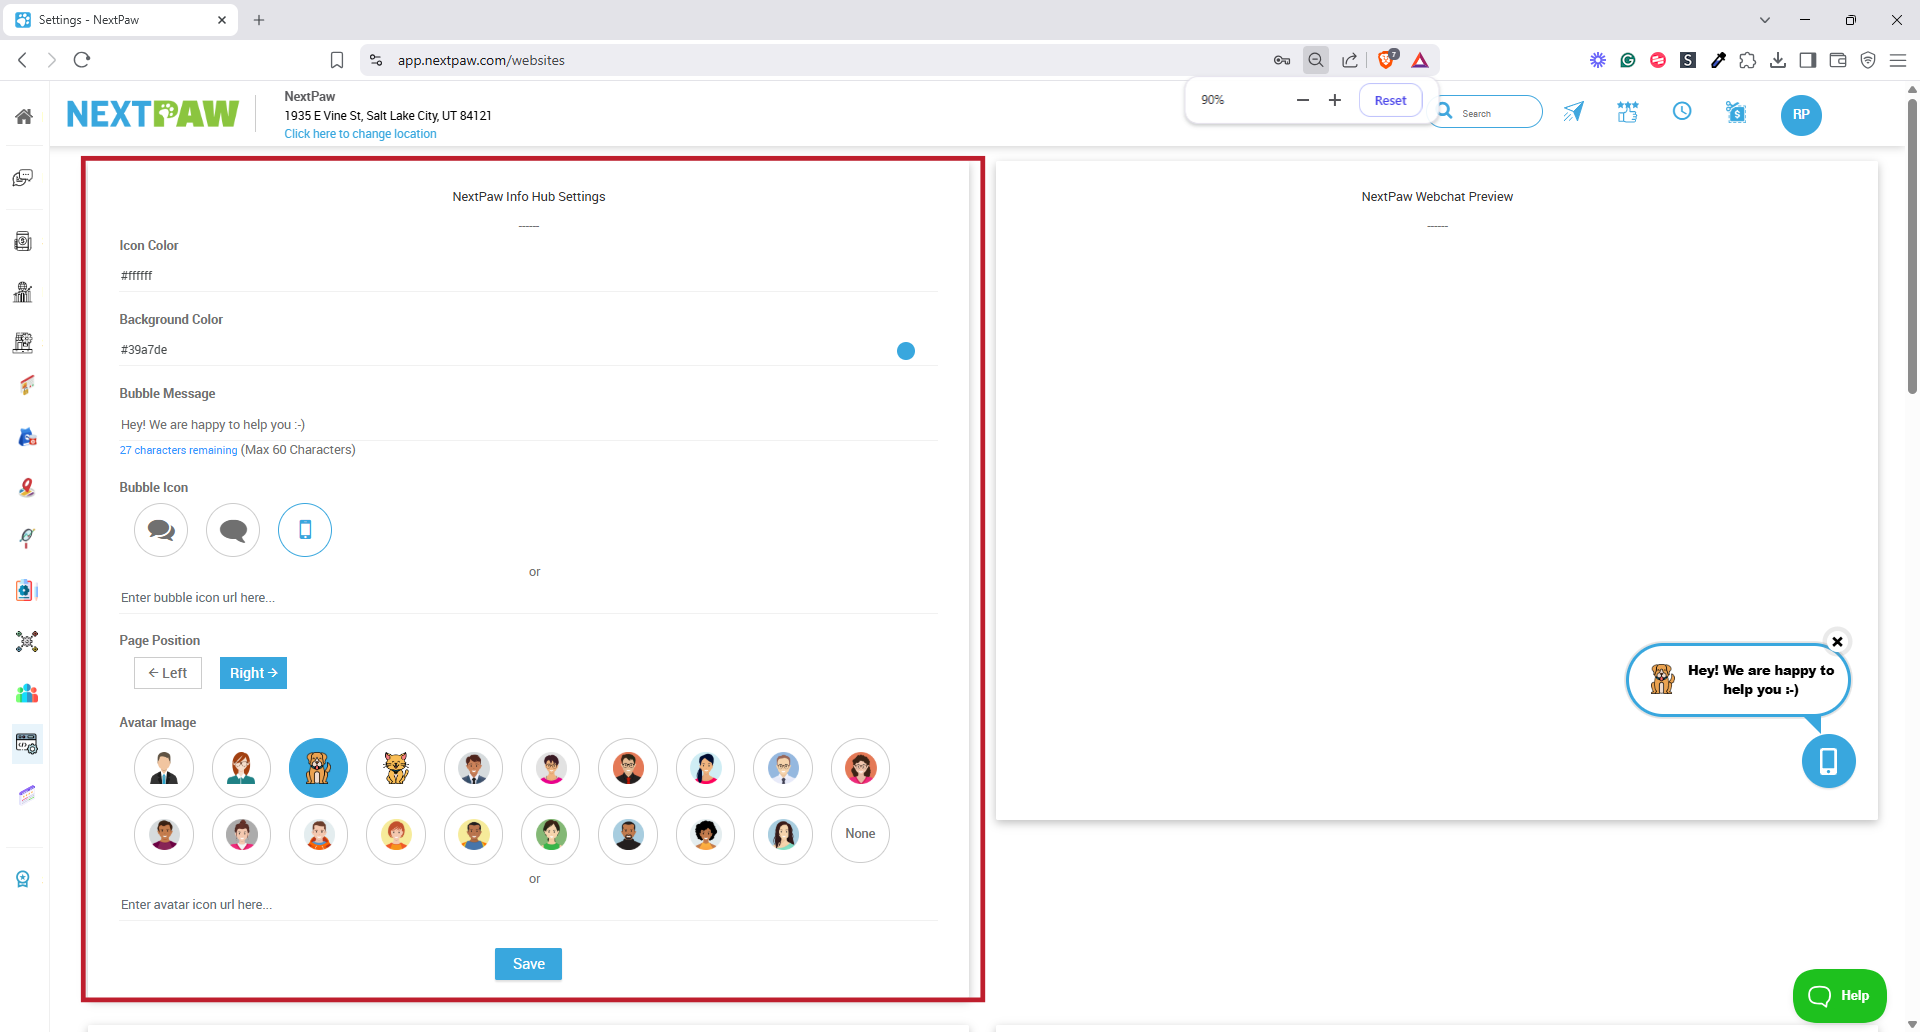
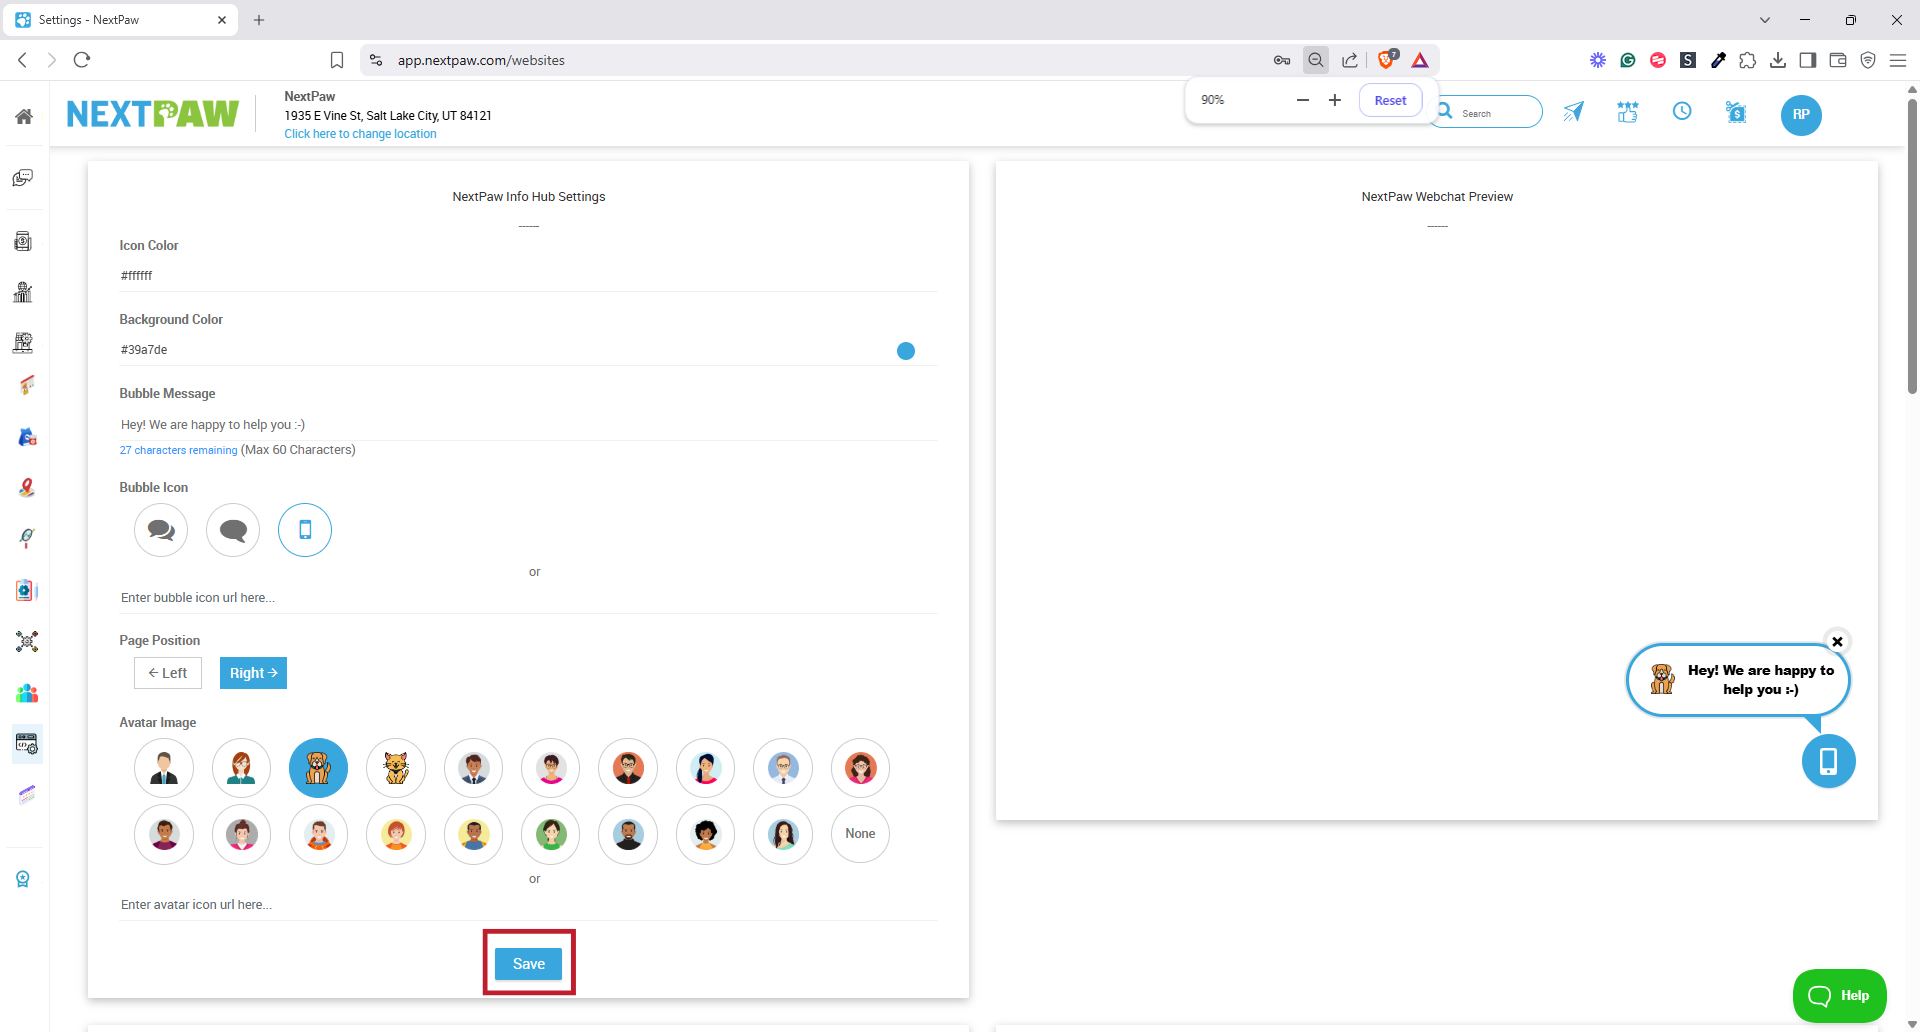
- Once you're satisfied with your customizations, click Save to apply all changes to your live Webchat Widget.


Support Text
You can also update the Bubble Message within the widget. Click the Bubble Message field to make any changes, then click Save to apply the updates to your live Webchat.
💡 SEO Boost:
Customizing your Webchat Widget to align with your brand builds trust and creates a seamless user experience, both of which contribute to longer site engagement, lower bounce rates, and improved local SEO signals.
Need Help?
If you encounter any issues, please reach out to us at Support@NextPaw.com.